Transforming My Closet
Hey girl, hey! It has been a minute, but I’m back to share ALL THE DEETS from the most recent project in my new home. Oh, yea, I’ve been a homeowner since October 2021 (in case you missed it) so stay tuned for more home edits and décor fun to come throughout this year.
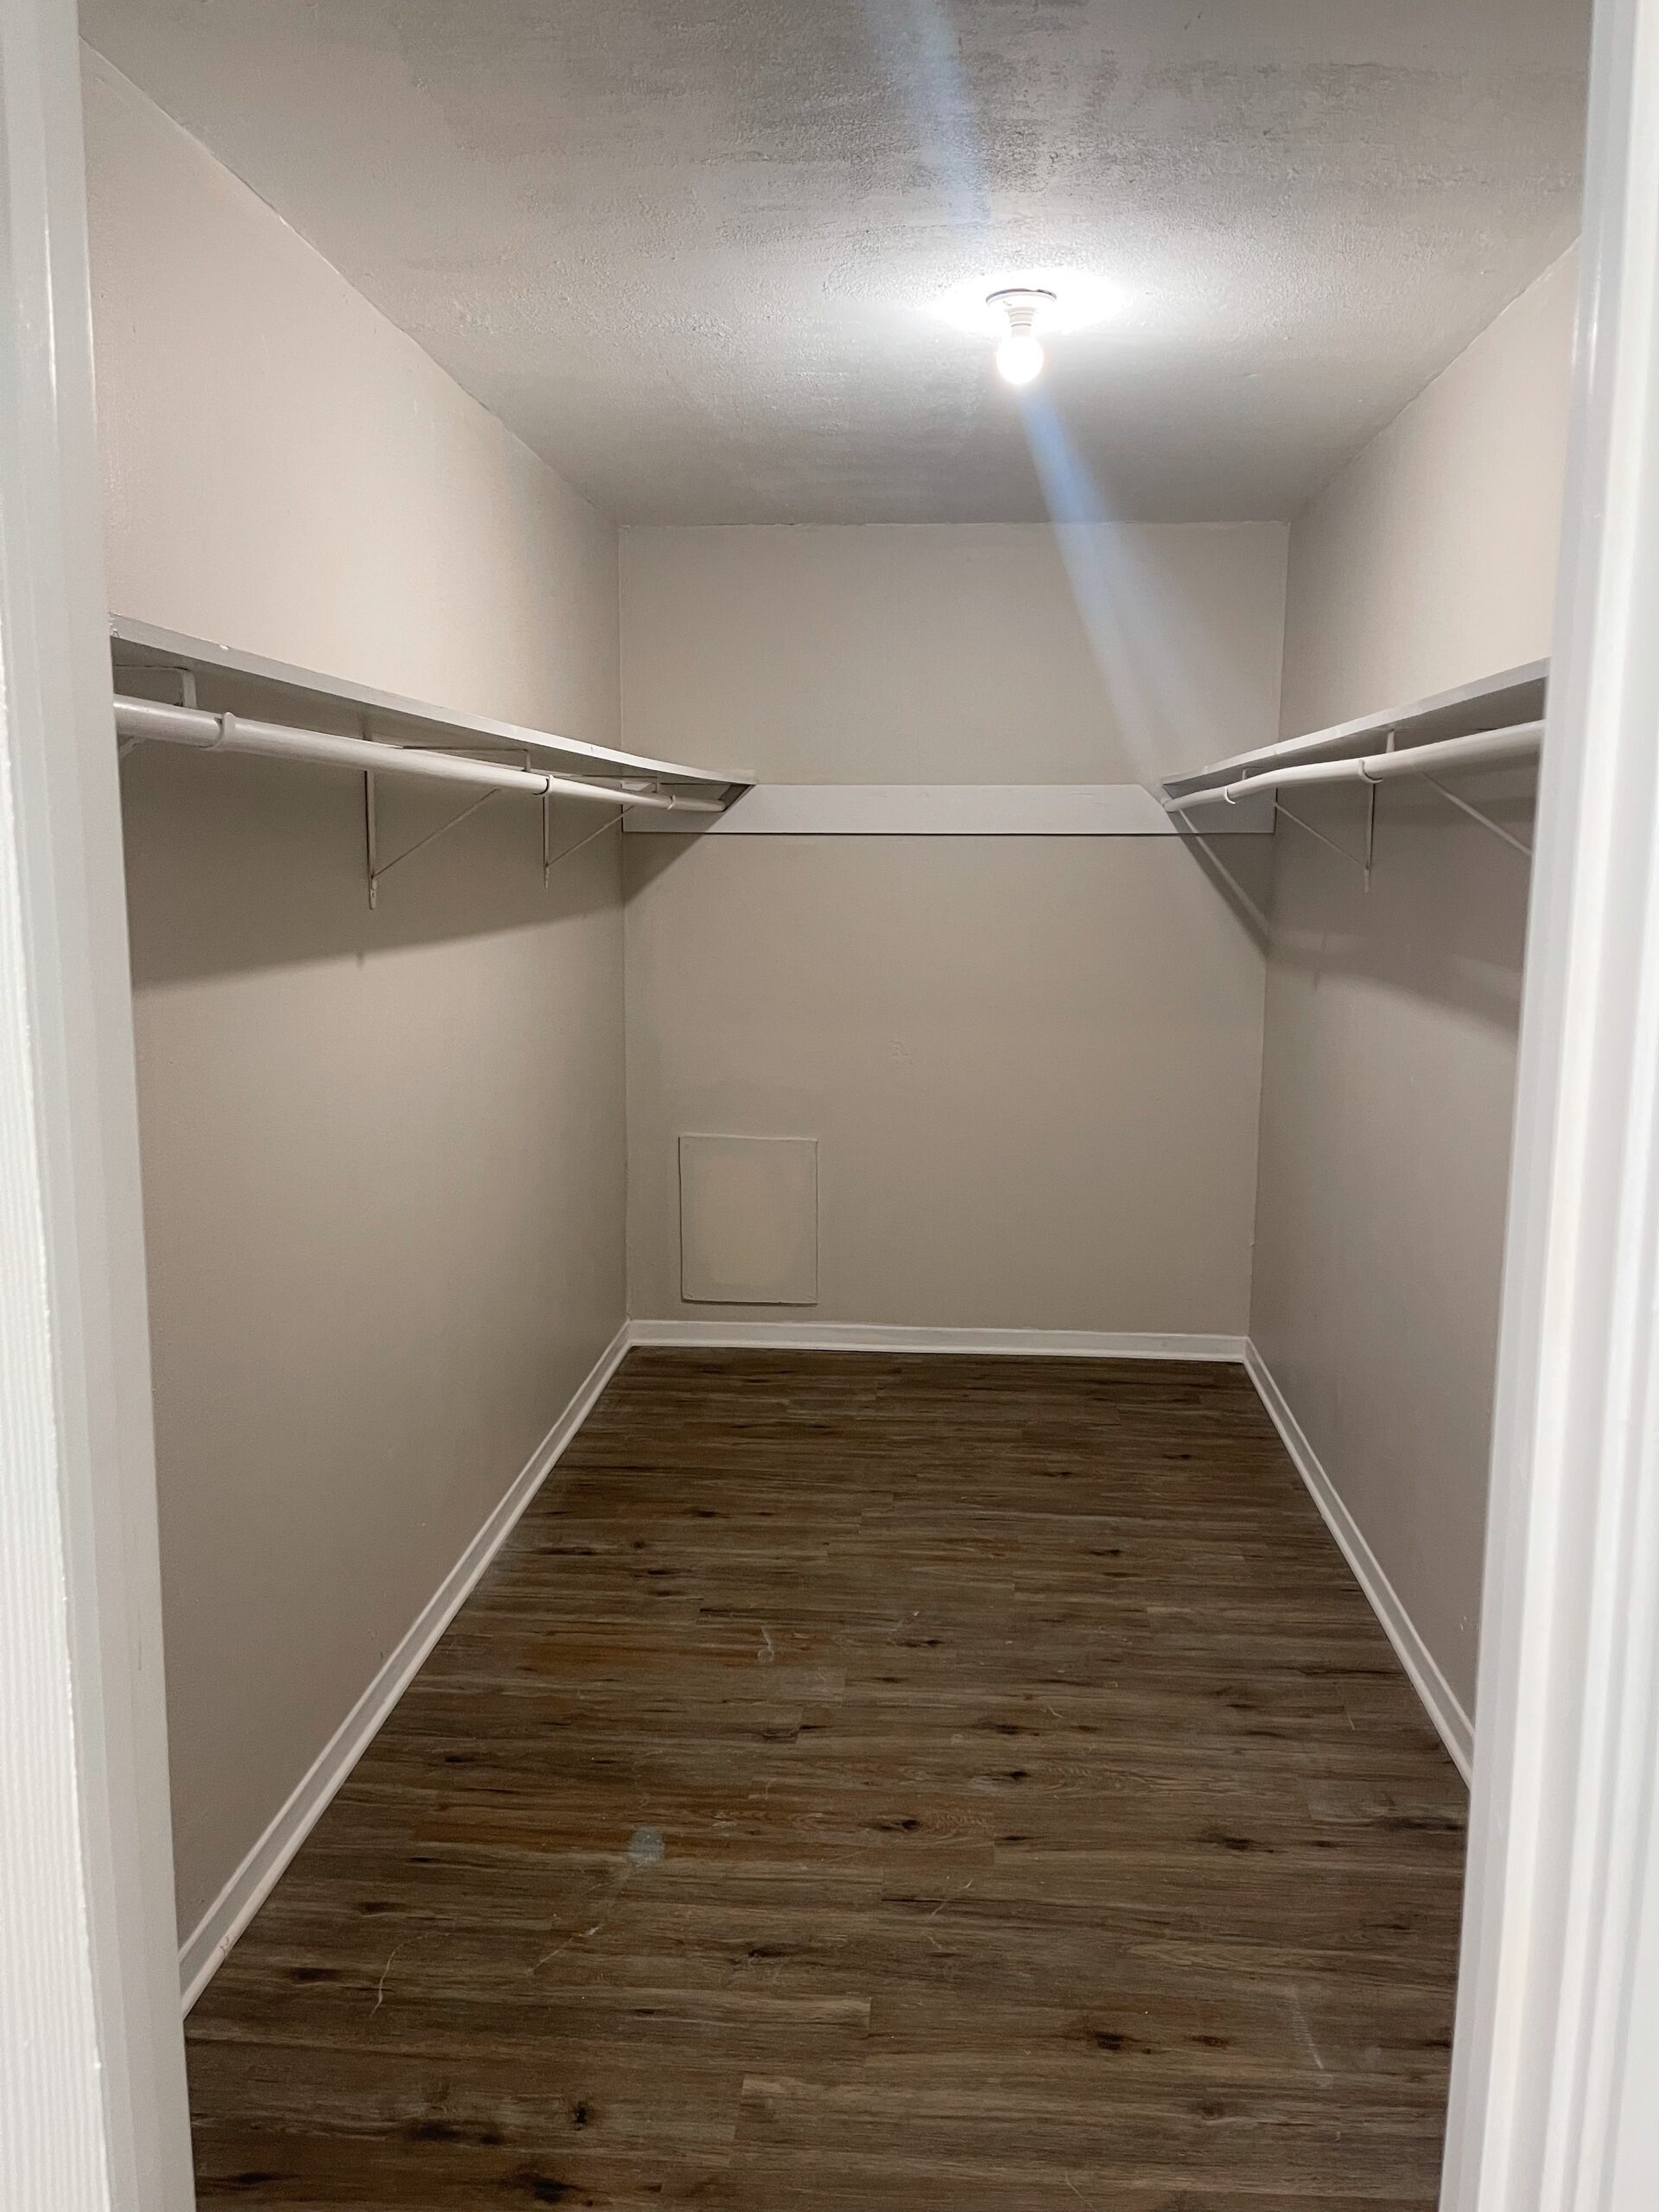
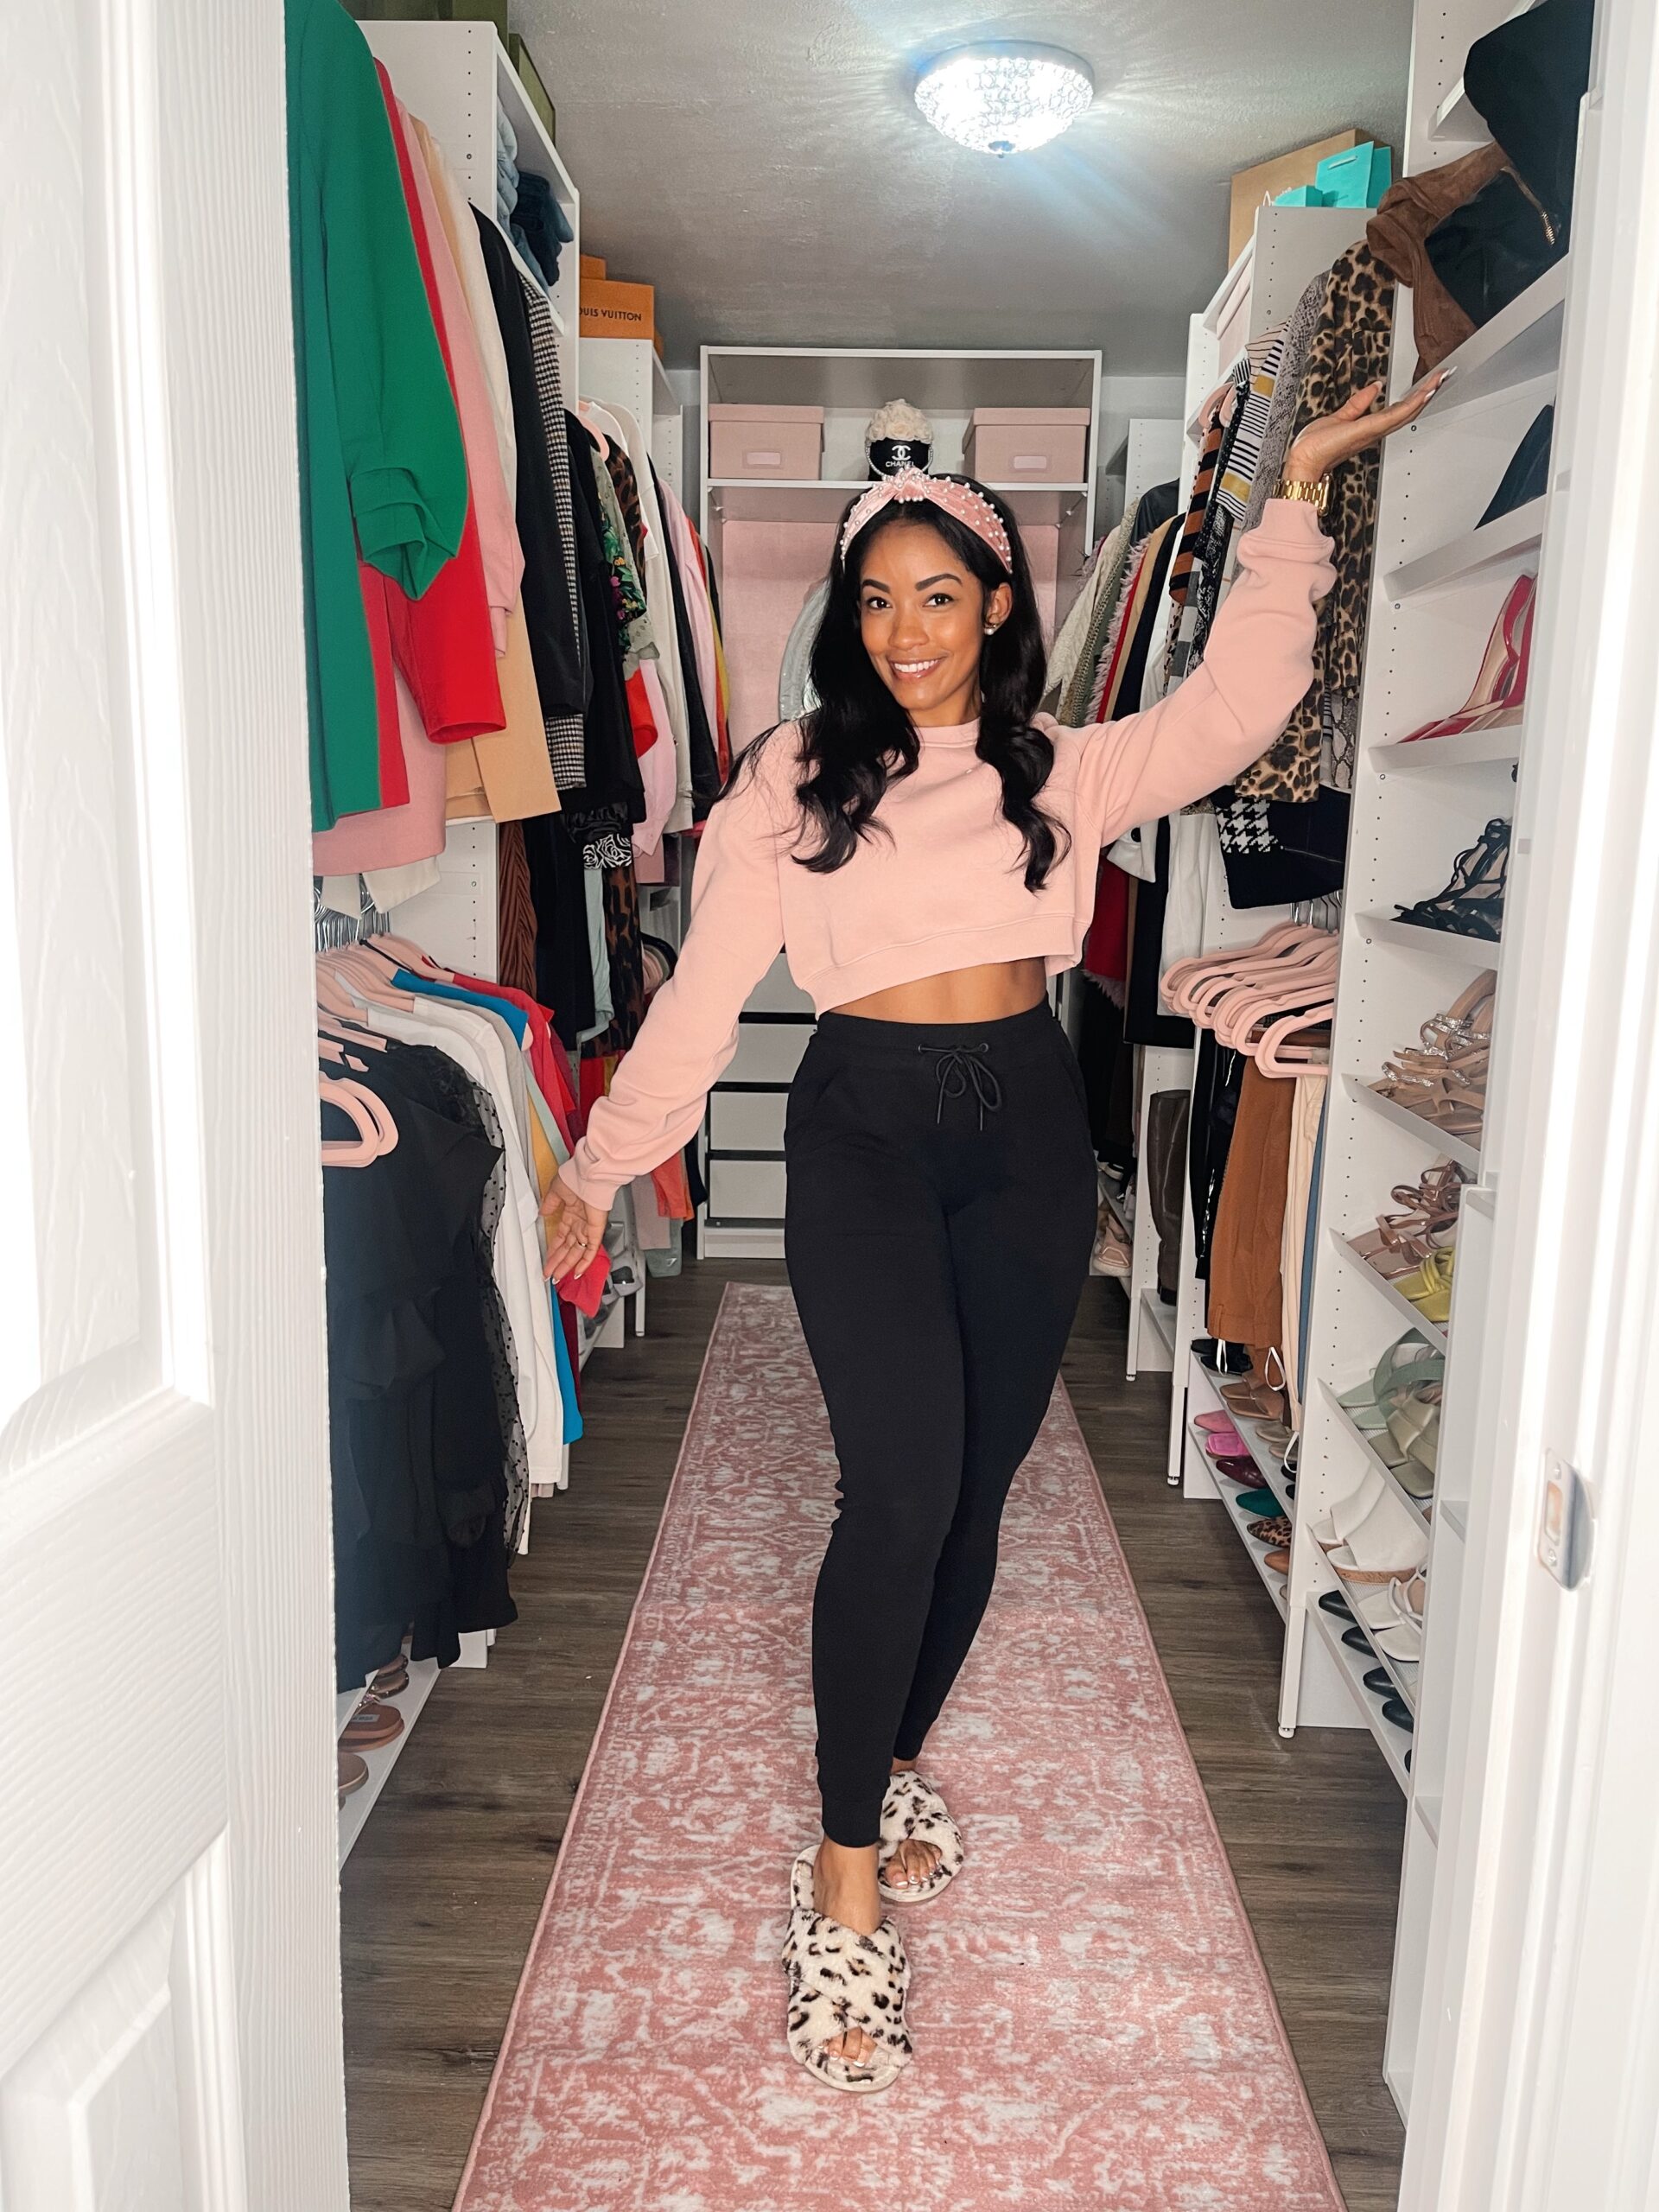
Anyways, back to why you’re here. I have always had a small space for a closet – when living with my parents and throughout college dorm/apartment life – I seriously never recall a moment where all my belongings could comfortably be stored or look aesthetically pleasing. So, as you can imagine, having a decent size closet was a top priority for me when selecting my home. I originally envisioned using one of my four bedrooms as a closet room but opted to utilize the designated master bedroom closet space since it’s still a great size and made the most sense to do. I’m happy that’s the decision I went with – after planning and putting in some manual work and labor, she came out great!
I’ll walk you through the 5-step process I took to create my desired closet.
Step 1: Research, Plan & Budget
I’ve always been a fan of the aesthetics of what’s called a closet wardrobe system – basically, a storage space within a closet that makes everything look so much more organized and efficiently stored into its designated space. The standard railing and little-to-no overhead storage of most closets prevent us from maximizing our space.
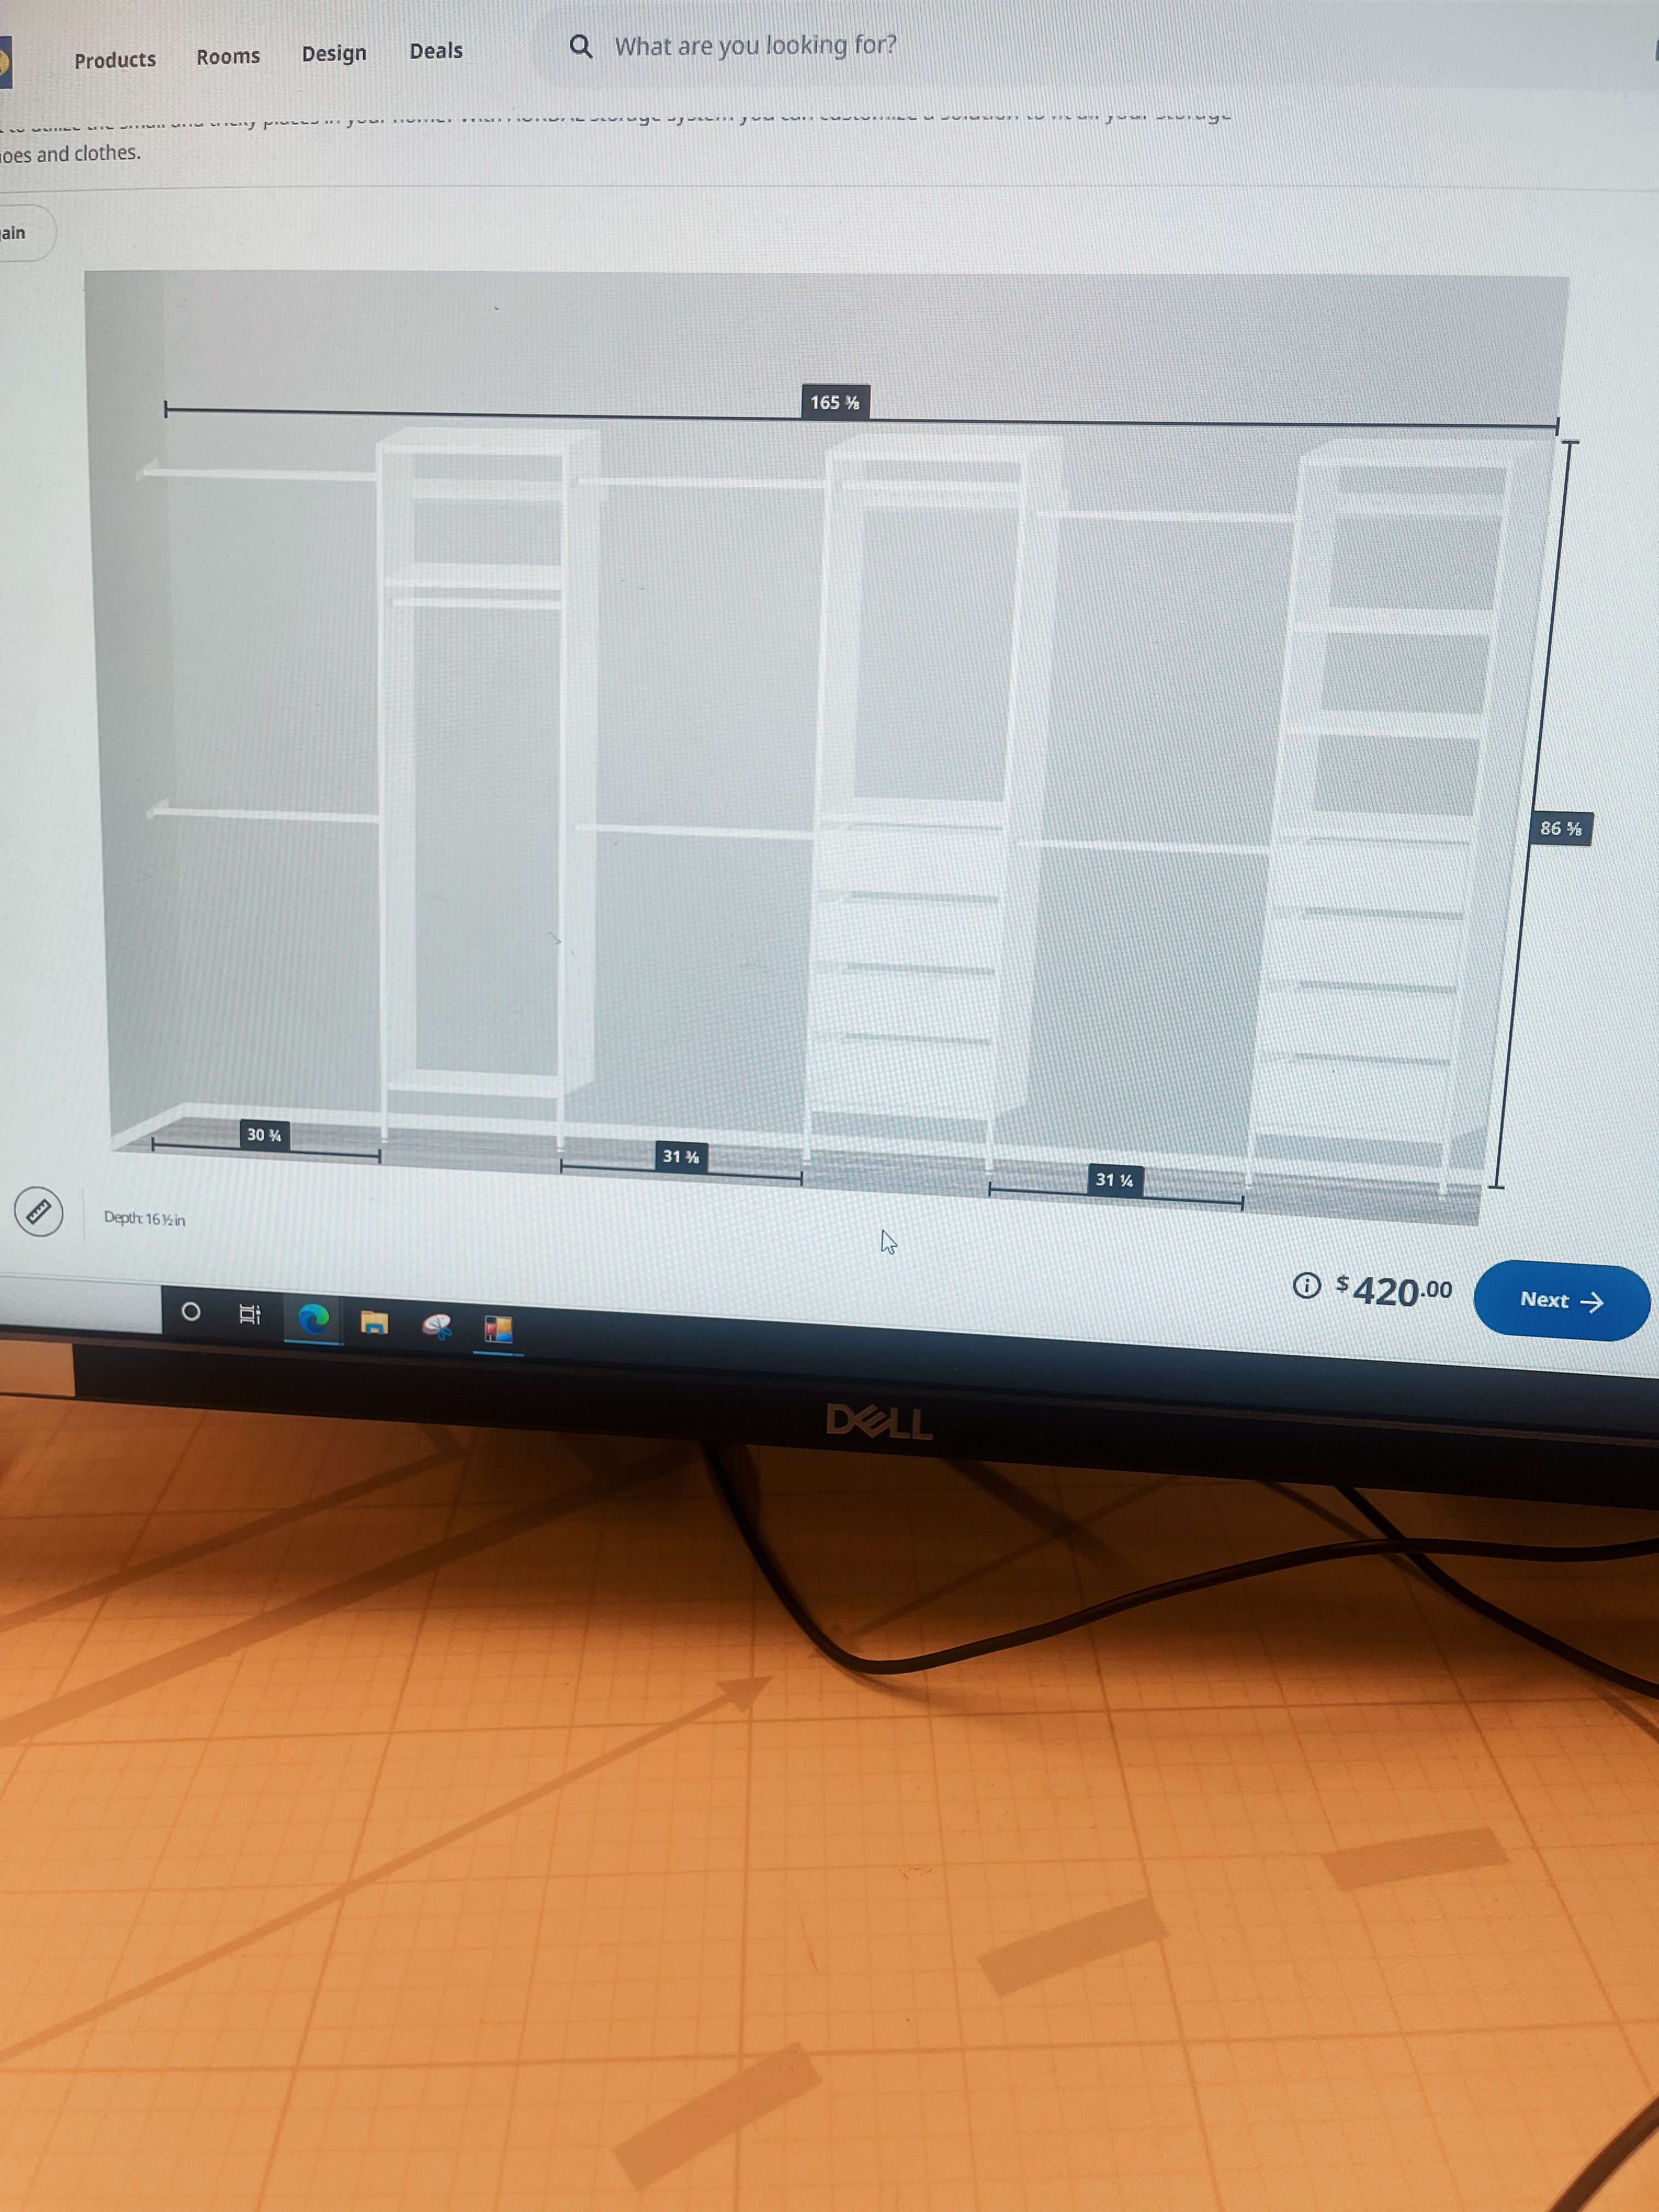
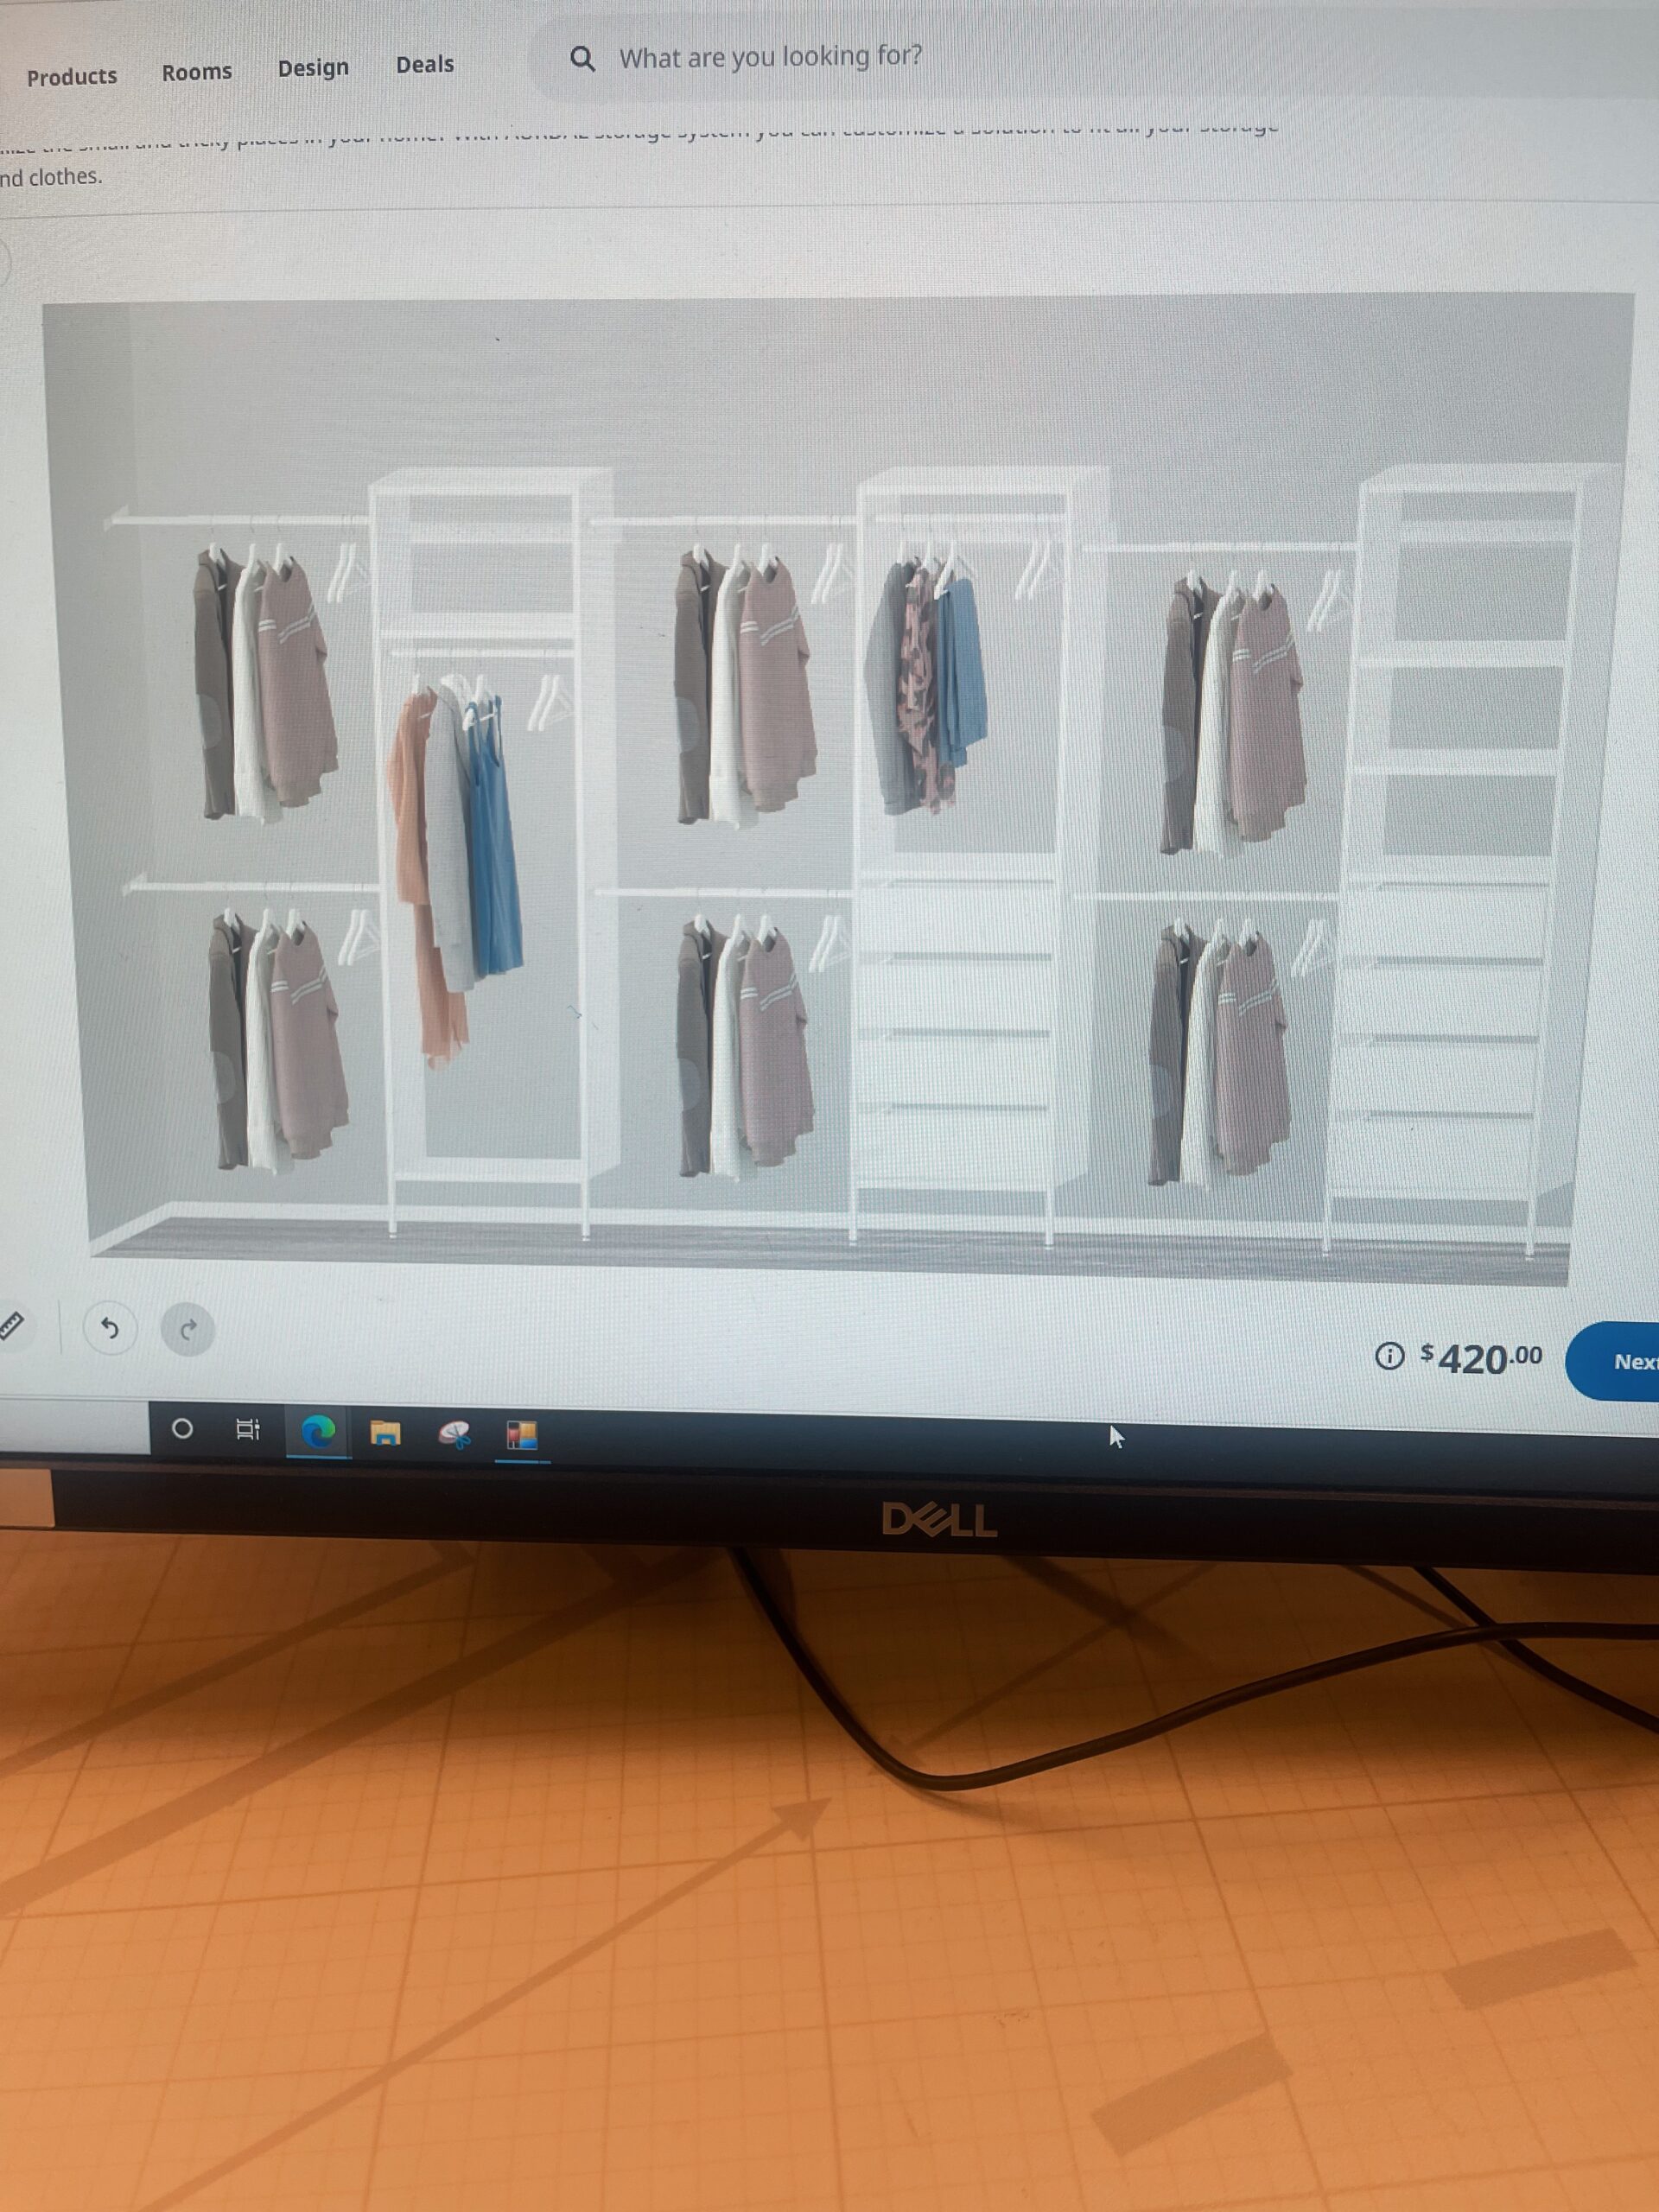
After researching, I found that there are many closet systems to choose from, but I decided to go with Ikea’s Aurdal and Pax systems since those were the best options for my space. I found that they are similar, but the Aurdal system is newer and a bit more cost-efficient as it’s made to fit into smaller spaces. Another one of the biggest differences is that the Aurdal is built on railings to the wall, whereas the Pax system is built as a stand-alone piece that does not require any nailing to the wall. To give perspective, the budget I allotted for this space was $2,000 (based on doing my entire closet with the Pax system) but primarily using the Aurdal system sliced that cost close to halfway down, allowing me to spend more on other items. Most of my closet consists of the Aurdal system, but I decided to do the back wall with the Pax system since it has qualities that I like and still wanted to have. Both systems are great and customizable, but I will say that the Pax has more customization options available.
You can design your Aurdal or Pax system to get a visualization, but you will need the approximate measurements of your space before doing that. You can also go up to any Ikea store and have an associate help you design your closet – this is the route I chose, and it made things SO MUCH EASIER. Irene at the Houston location was beyond helpful and patient. She helped me design my customized closet and gave me a printout of every item I needed and the total price.
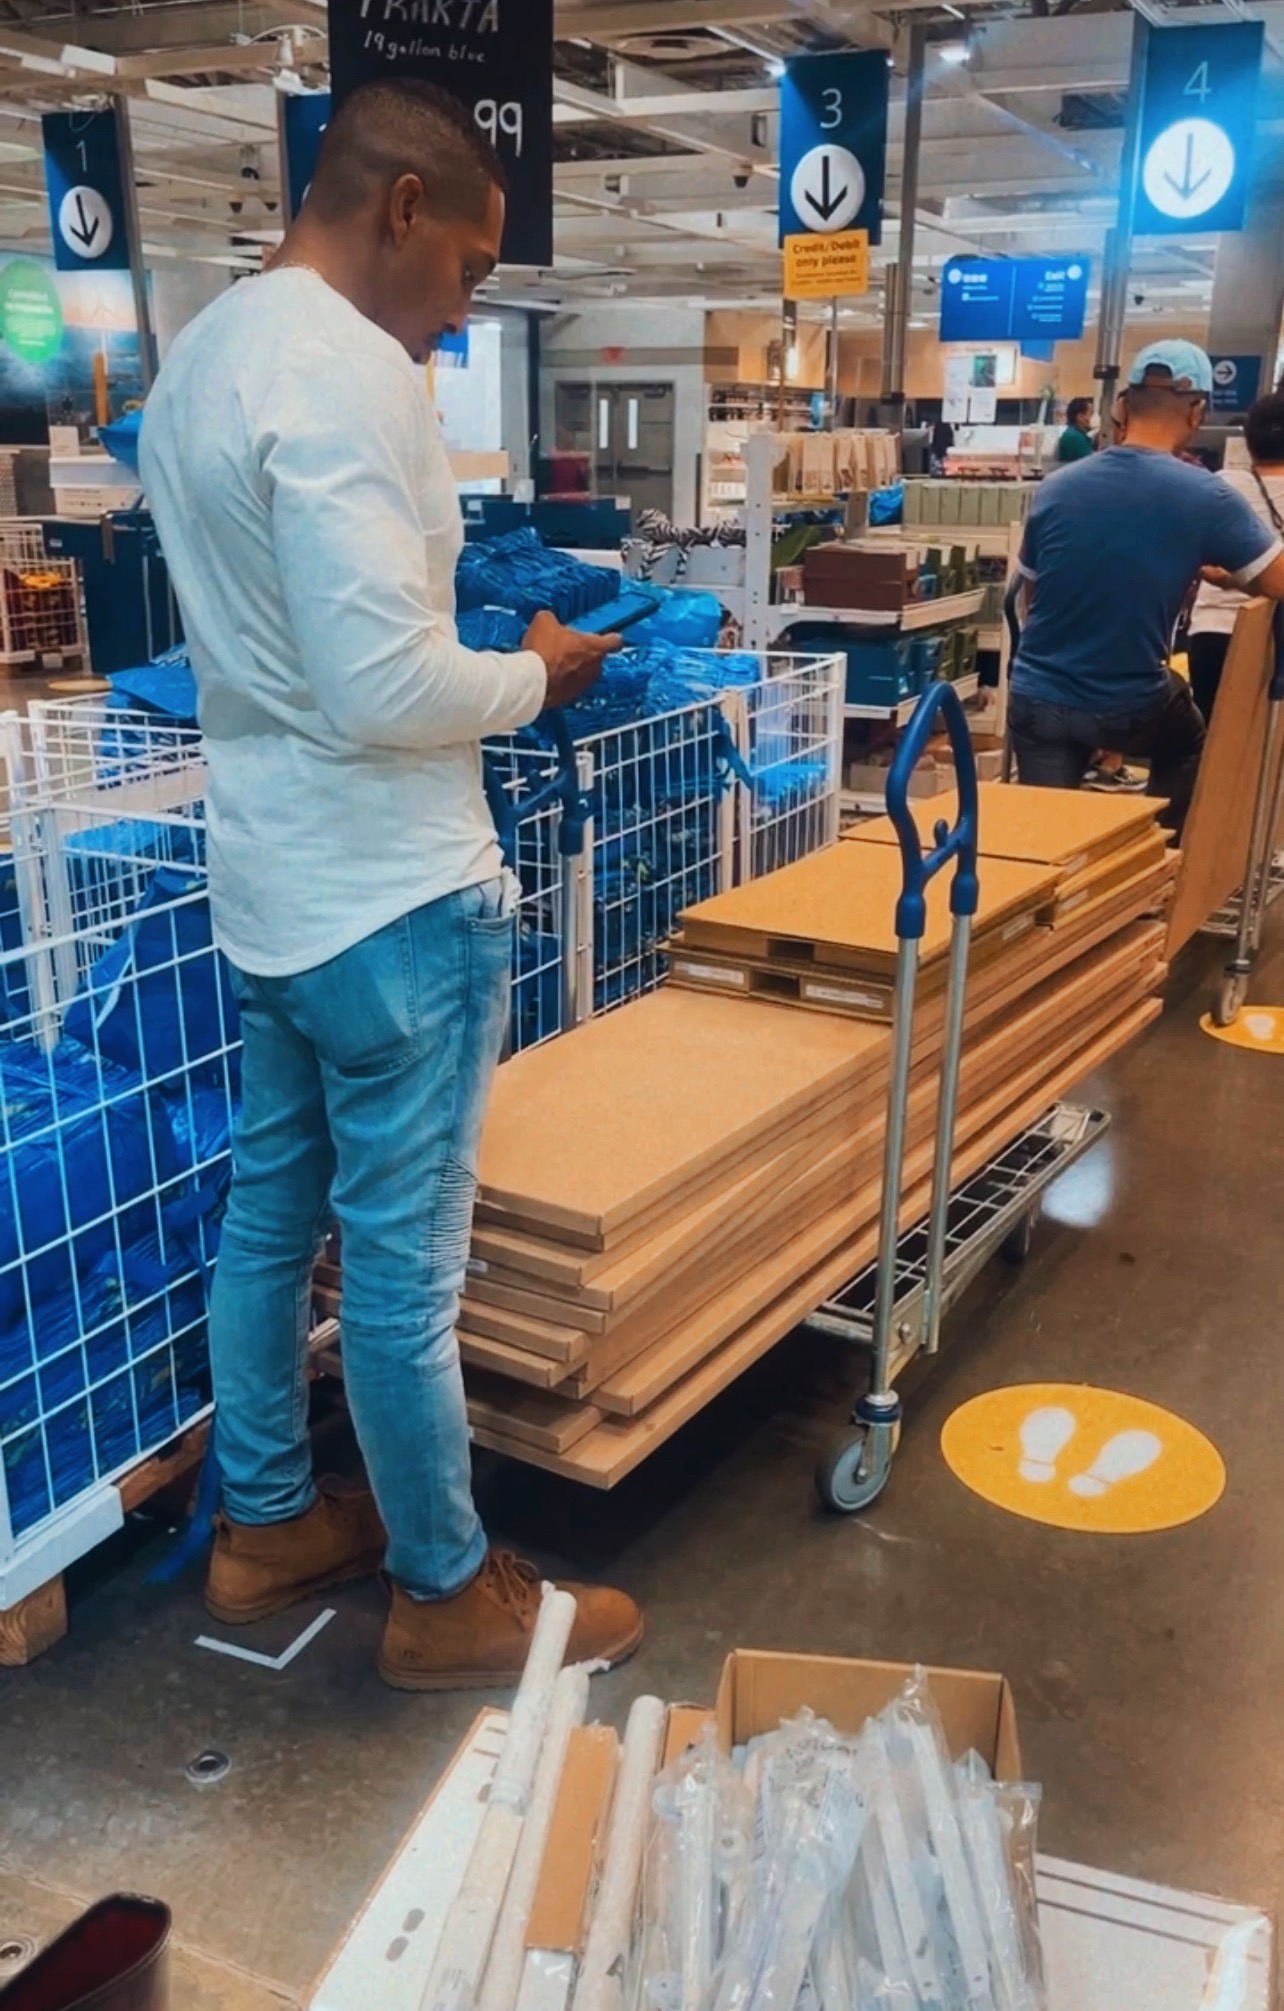
The only downfall was dealing with items that were out of stock. I purchased most of my items in-store in November 2021, but there were several pieces I had to wait to purchase due to high demand and unavailability. This downfall delayed my project completion by a couple of months (finished building in January 2022), but on a positive note, Ikea’s waitlist notification system is legit. I was able to get notifications sent straight to my phone as soon as the items I needed were back in stock. They also gave me a date range of when the items were expected to be back in stock.
Step 2: Paint & Assemble
While waiting for a few more of the pieces to come in, my mom and I geared up to paint the walls of the closet space white to match the closet systems (this is optional, but it looks better this way to me). Before painting, we had to remove the rails and shelving which took a lot more elbow work and manpower than we expected. Removing the rails left a few holes in the wall, so we filled them with drywall putty, patched them up then smoothed it out with sandpaper.
Once this was complete, we painted the walls with two coats of white paint then Josh (my oh-so-sweet boyfriend who funded this entire project as a birthday gift to me) began assembling the Aurdal pieces. We did not plan to build the closet on our own, but we could not find a vendor who was willing to do the project and Ikea didn’t offer the service for the area we live in. Having Josh build my closet made me appreciate it 10x’s more, but I’m sure he would recommend hiring someone to do it if that’s an option for you.
The assembly process wasn’t difficult once he got the hang of things, it was just VERY time-consuming and Ikea’s assembly manuals weren’t the best to understand. For perspective, we used about 10 hours (with breaks) on a Sunday to complete one side of the closet. A couple of weeks later, we repeated the same process for the other side, then used another ½ day to complete the back wall with the Pax system. We were HAPPY when this step was complete…. Whew, chile.

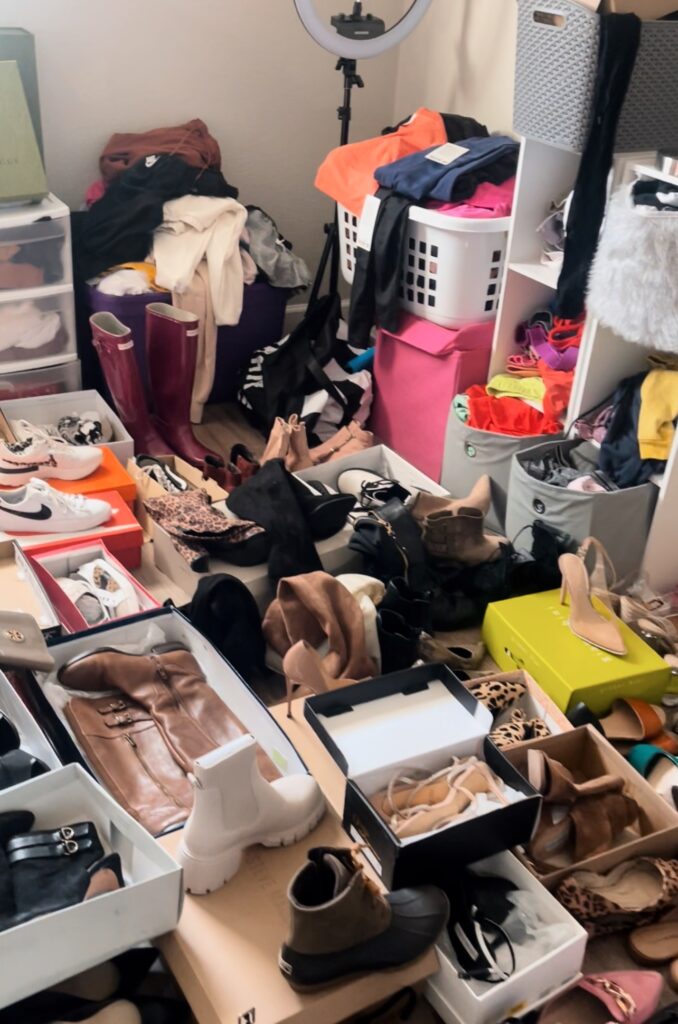
Step 3: Declutter Belongings & Transfer to Closet
The next step consisted of transferring my shoes, clothing, and accessories into the space, but first I had to declutter. I hired my favorite wardrobe stylist, Jacobie (find him here) to help with this step as well as the overall visualization of my wardrobe layout. He was a TREMENDOUS help with helping me eliminate items (literally half of my wardrobe) I no longer needed and had the perfect eye for laying everything out.
Additionally, he categorized the sections of my closet based on my preference (accessories, business casual, dresses, athleisure, etc.) and color-coordinated solid colors and mixed prints separately. I appreciated his service and highly recommend utilizing a wardrobe stylist for this step if you can!
Step 4: Aesthetics, Duh
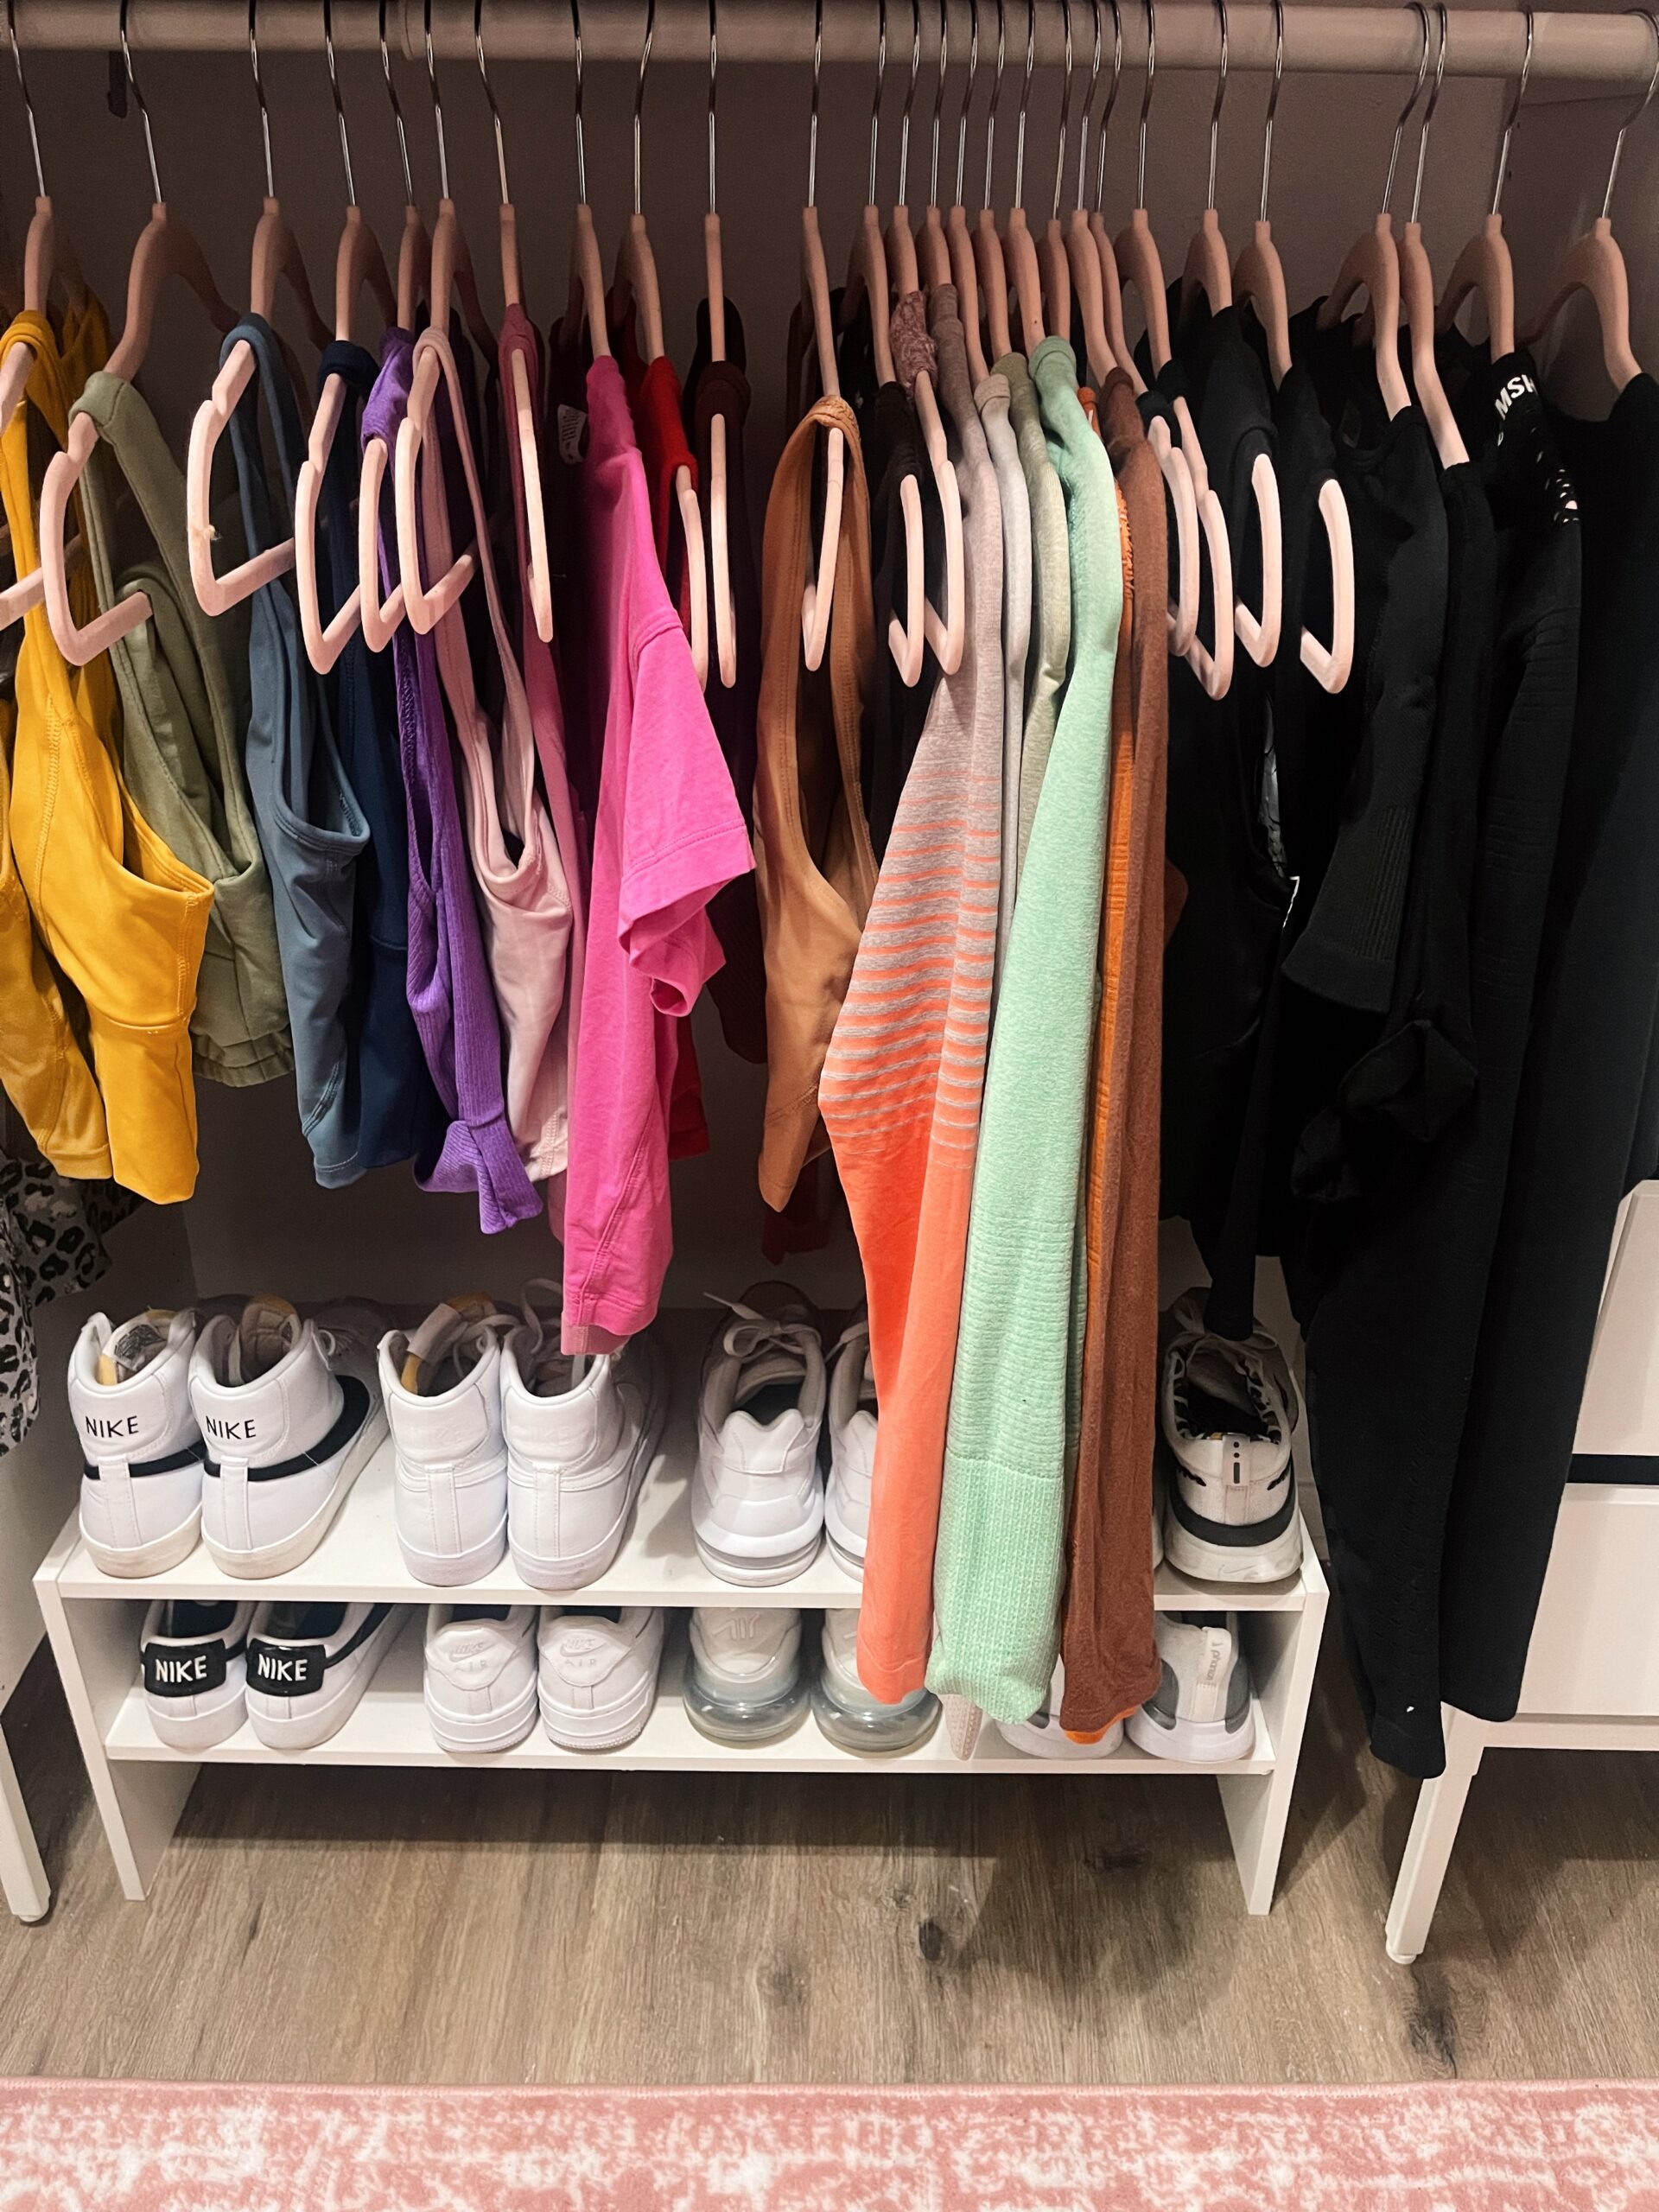
I created a digital vision board (optional) at the beginning of (and throughout) the process to gather all my thoughts and ideas in one space. This step fits best here since I utilized it most once the closet was already assembled, but it was great to have on-hand from start until finish of the process. It easily became my go-to for creating the vibe for the space. Doing this helped me confirm my color scheme of white and blush/pink with hues of silver. I played around with so many ideas, bought a few different rugs, and did “the most” as some would say to ensure my personalized boutique of a closet came to light. Regardless of how small or big your space is, you want to appreciate the beauty of it – this will motivate you to keep it looking organized. Aesthetics are everything…duh.

“I like my money where I can see it – hanging in my closet.”
-Carrie Bradshaw
Step 5: Remember; The Little Things Matter
No, but seriously, if your closet space doesn’t feel like a mini boutique when you walk in then you’re doing yourself a disservice. I don’t think that was my overall goal in the beginning, but as things came together, I loved feeling like I was walking into a cute little store. I achieved this vibe by adding in little things that I realized mattered:
- Blush velvet hangers – having all my hangers be the same was a MUST. Not only is it aesthetically pleasing, but it efficiently creates more space rather than the alternative of having random bulky hangers prevent from doing that. Who knew there were so many shades of blush to choose? It took a few orders for me to find the right shade, but these (found here) worked best for me.
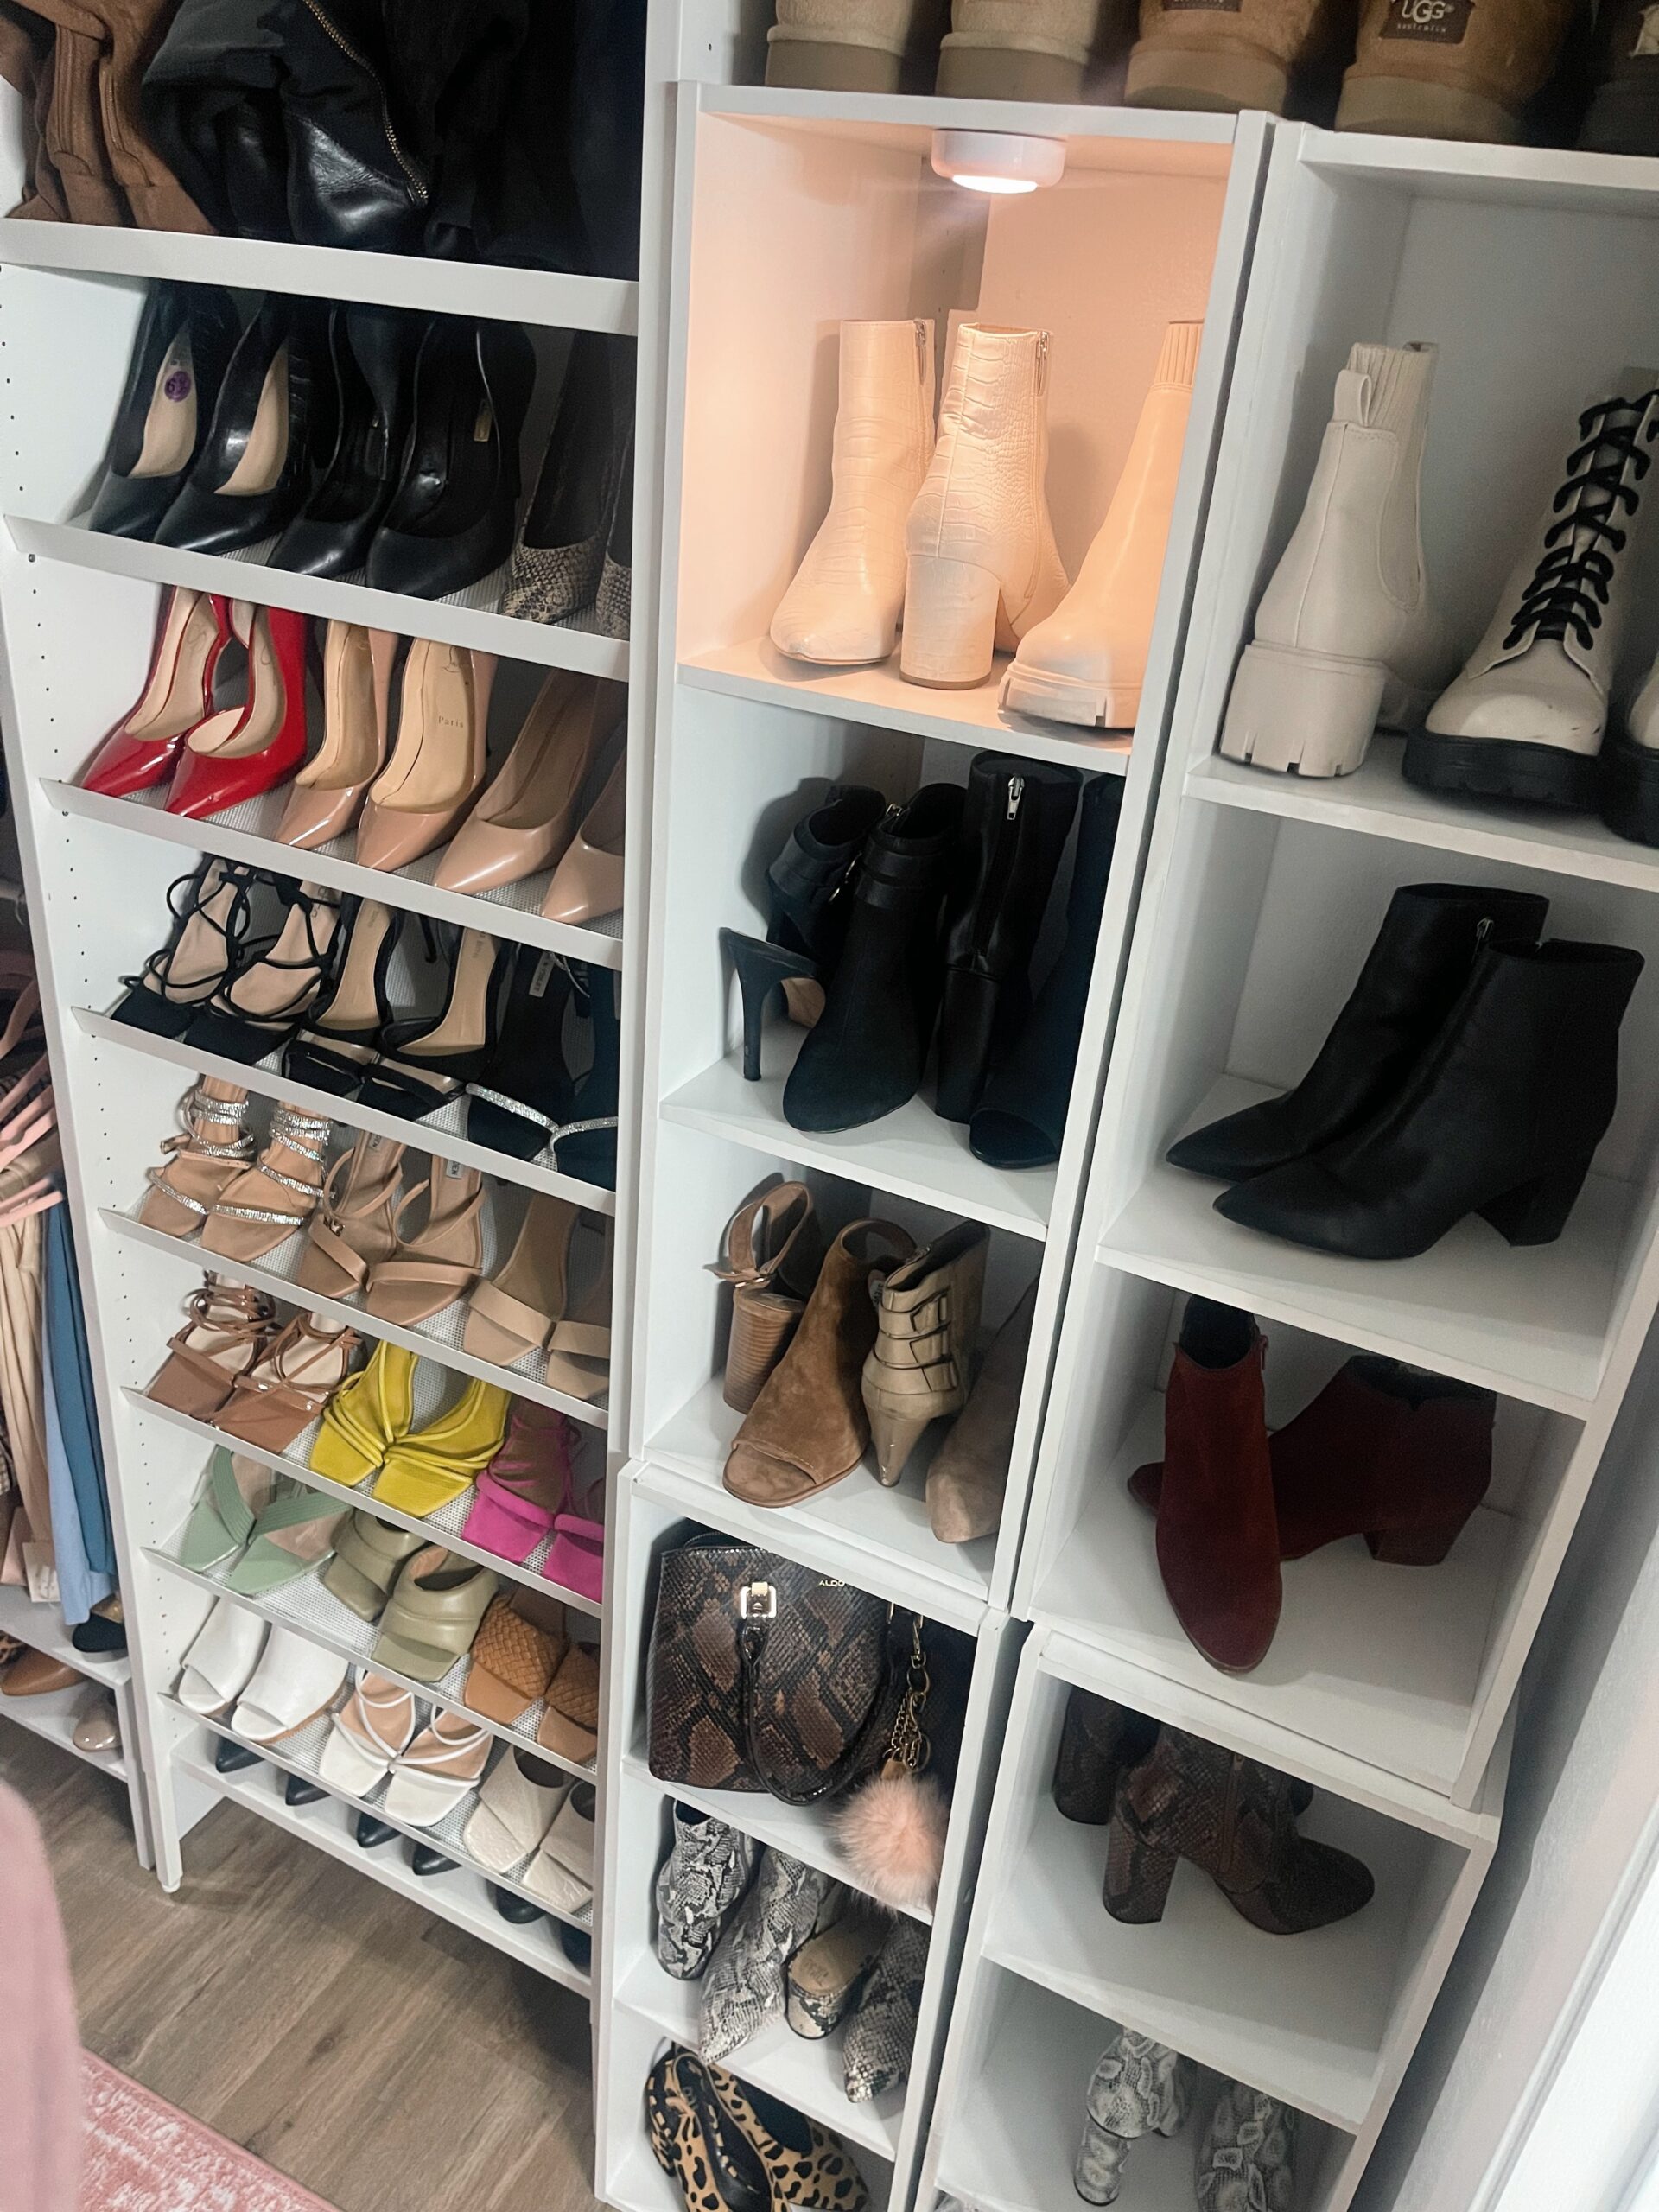
- Shoe shelving – Aside from Ikea’s Aurdal shoe rack, I needed more space for my shoes. Rather than putting them on the floor (thanks to a tip from Jacobie), I found the perfect 2-tier shoe selves (found here, but compare prices here) to go underneath each of my wardrobe systems to complete the vibe. These complemented the space and elevated the overall presentation of my shoes. I also already had a few white cube-organizing storage shelves (found here) on-hand and utilized them to display more of my shoes and accessories.
- Peel and stick wallpaper – Creating a mini accent wall was a must. I debated between doing something abstract but decided to go with a metallic pink wallpaper (found here) that matched the rest of the décor. It took two of us to put it up, but it was super easy to add, and I highly recommend as an easy addition to your décor vibe.
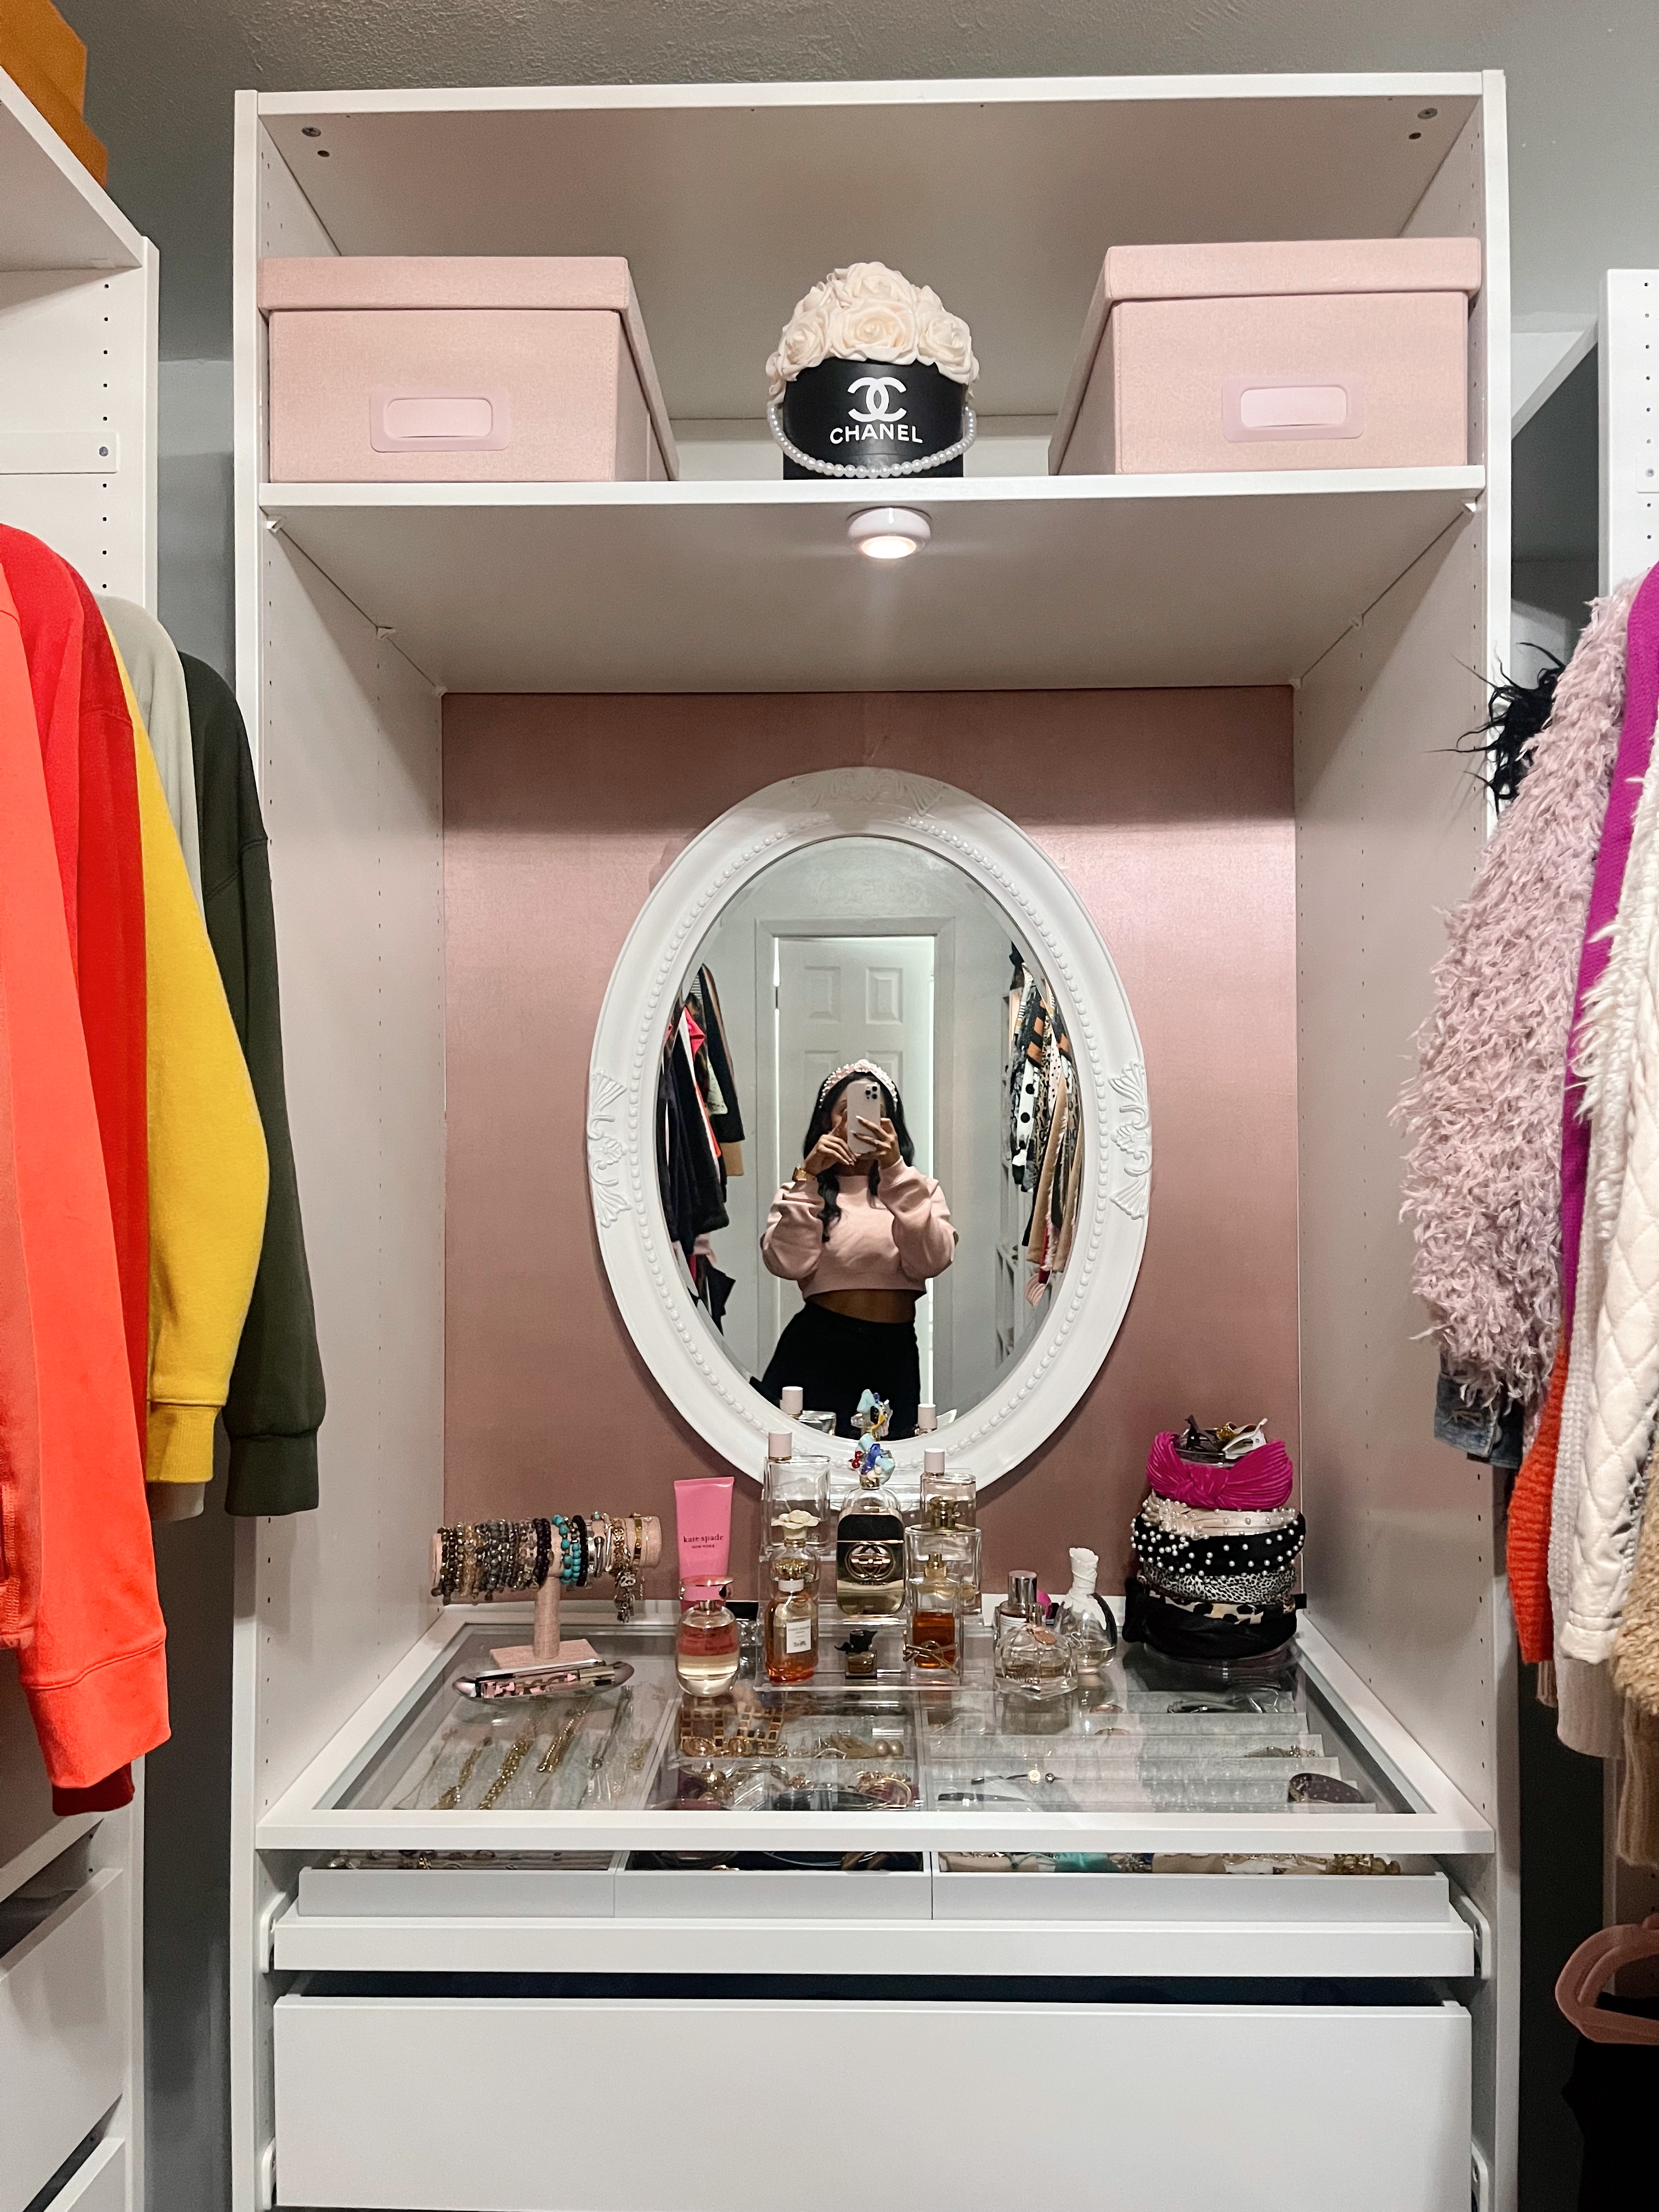
- Mirror – This was of course a must-add on my accent wall. Since I already have a huge full-body mirror in my bedroom (found here), I opted to get a cute small/medium sized oval mirror (found here) for my closet. It matches perfectly!
- Rug – As with any space, adding texture to the room by adding a rug instantly creates a more welcoming vibe. I debated between going with a cow print rug (found here) versus a blush oriental (found here) one. I decided to go with the latter but kept the other for another room.
- Lighting – I ordered the cutest little chandelier (found here) and had my dad put it up for me since he’s great with those types of things. I also added push lights (found here) throughout my closet for an added touch of light and ambiance.
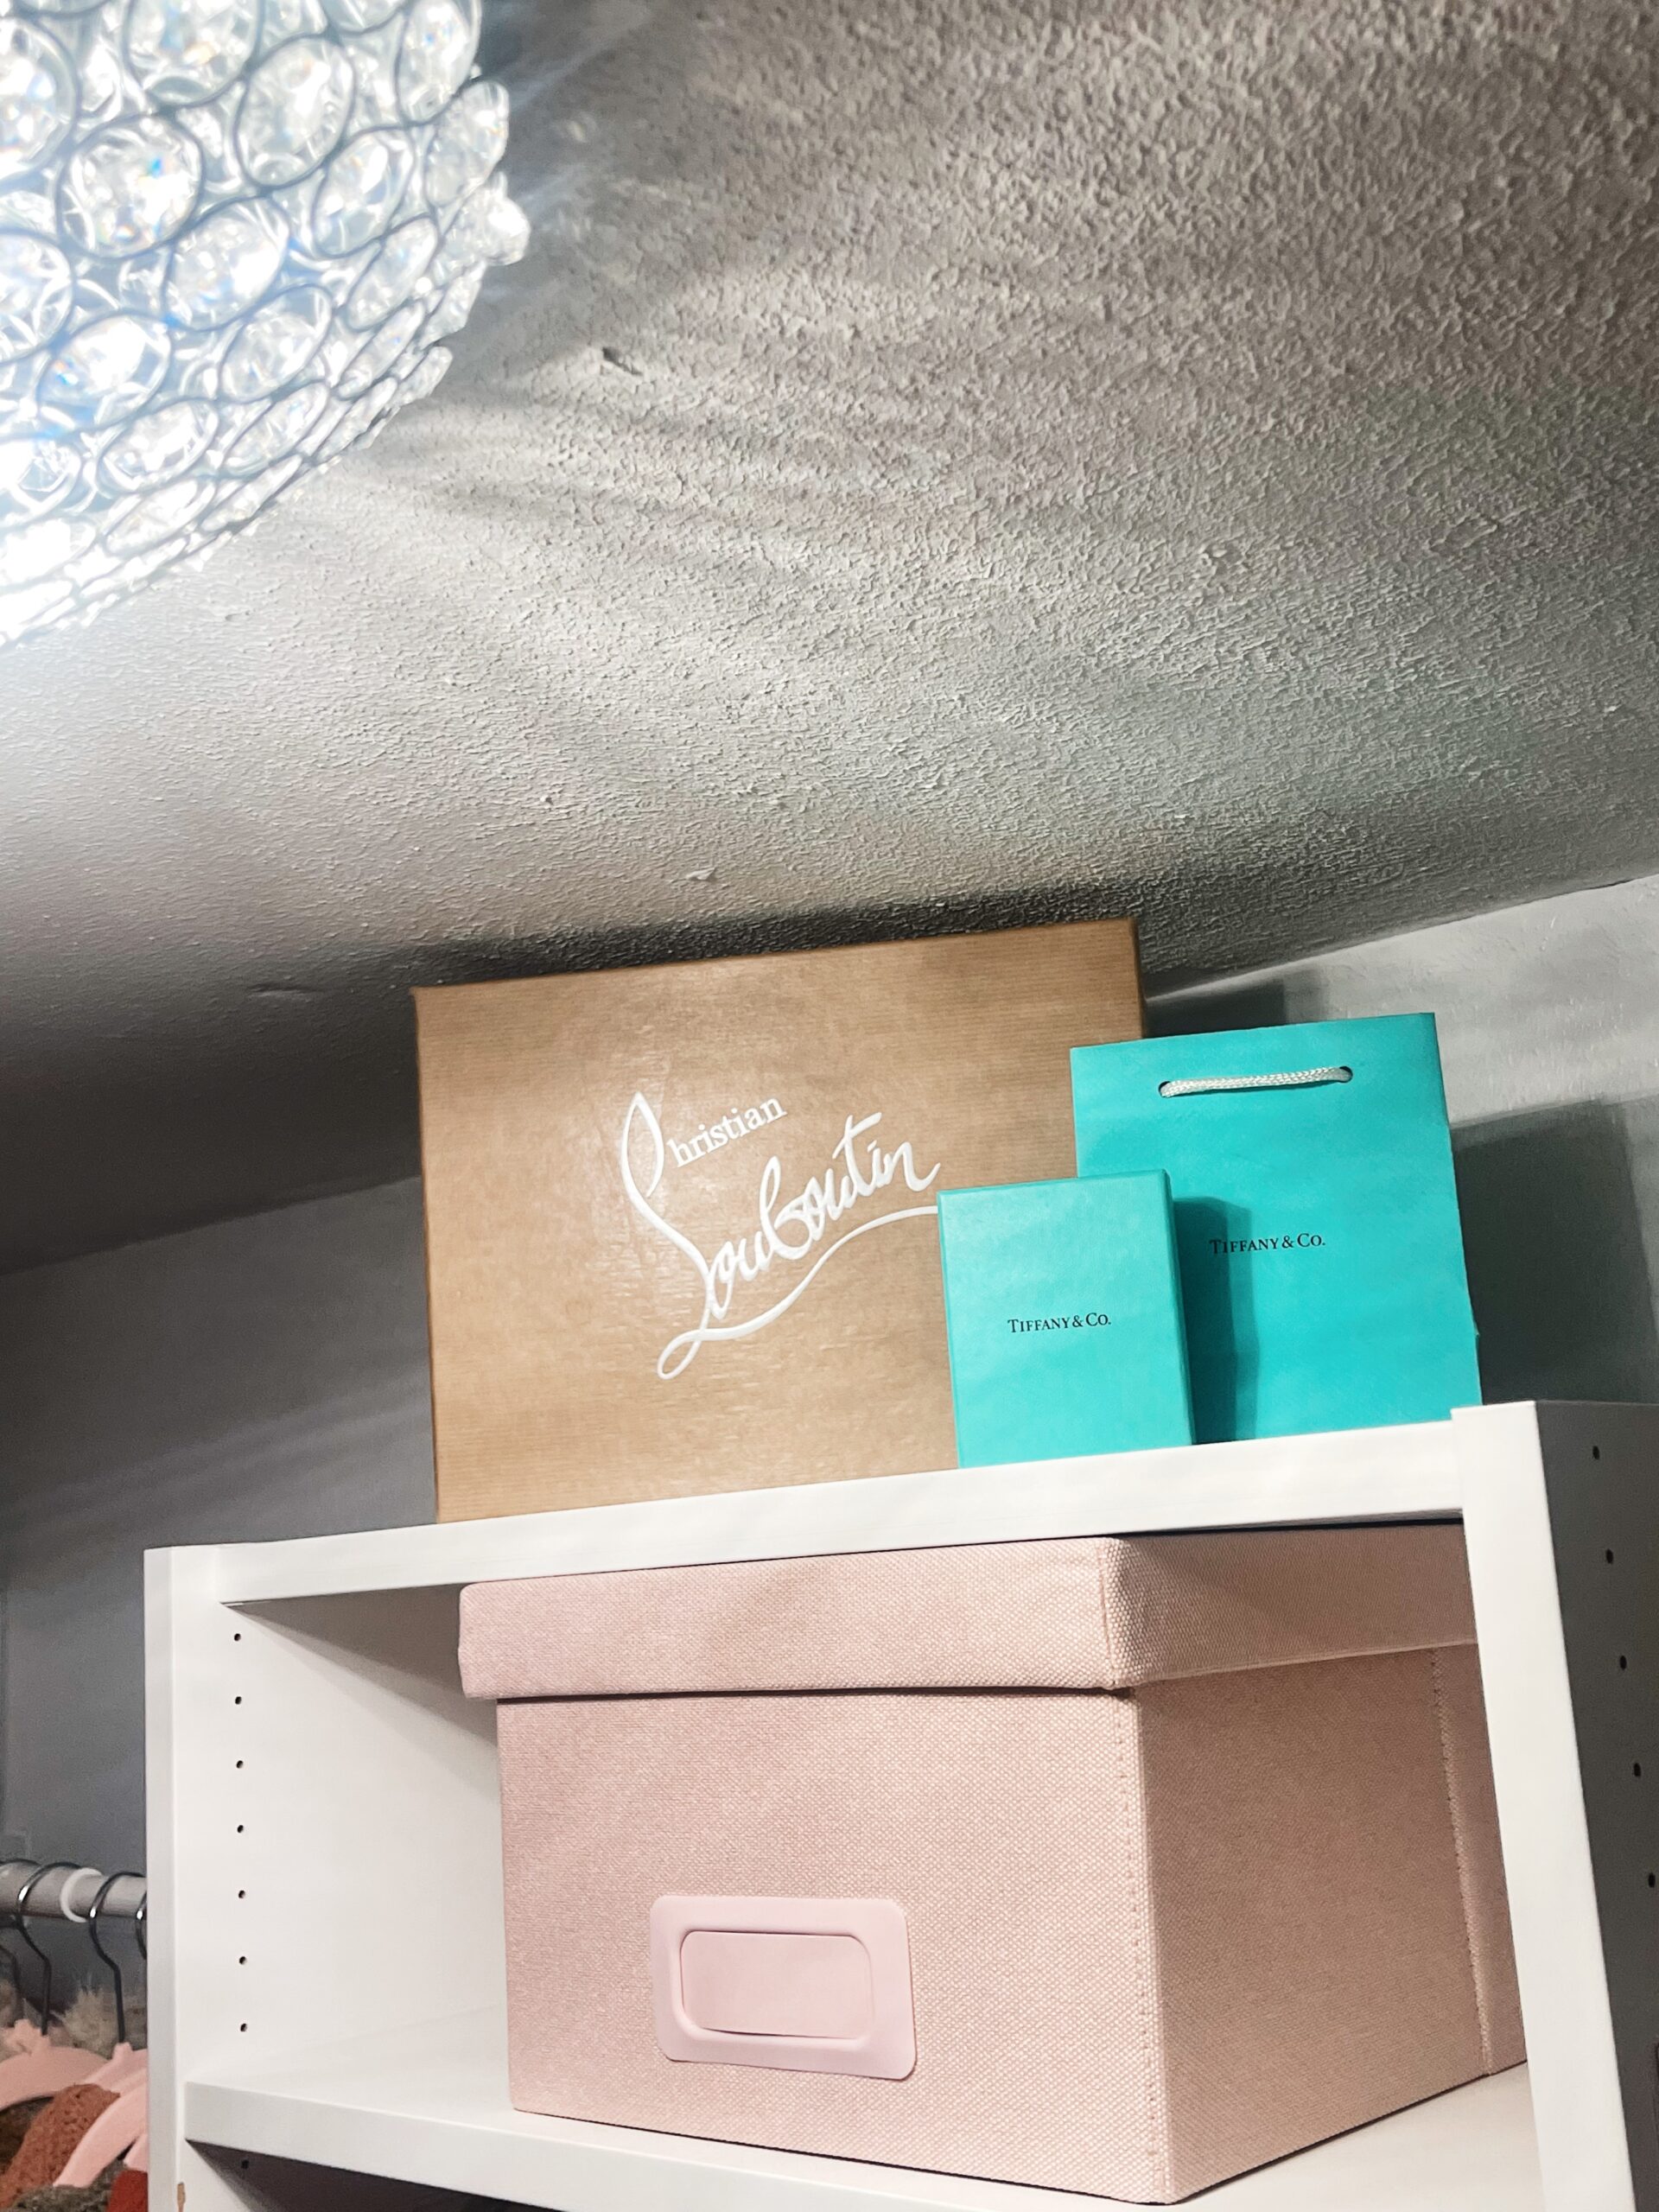
- Storage boxes – These create cute storage space. I ordered pink linen storage boxes (found here) that matched perfectly. I plan to use them to store swimsuits, flip-flops, scarves, and other seasonal items as needed.
- Acrylic riser stand shelf – I purchased this stand (found here) to display my perfumes and love it!
- Headband storage – I have a TON of headbands, with some that are worthy of being displayed. I purchased this stackable headband/hairbrush holder with an accessory compartment lid that stores all my fashion headbands (found here). It was a great buy and I love displaying my favorite headbands on the outside of it.
- Bracelet display holder – This is the cutest T-bar bracelet holder (found here) that matches the vibe of my closet perfectly – it was the cutest addition for some of my bracelets, but it could also be utilized to display headbands or other accessories.

- Designer flower bouquet – Through a social media search, I randomly found a luxury bouquet vendor (found here) who creates the PRETTIEST luxury bouquets. I chose a Chanel bouquet and it’s easily one of my favorite items to view every time I walk into my closet.
- Rose Collapsible Stepping Stool – This was needed to be able to reach items I have stored up high. It tucks away easily, but I don’t mind keeping it out since it matches perfectly. Find it here.
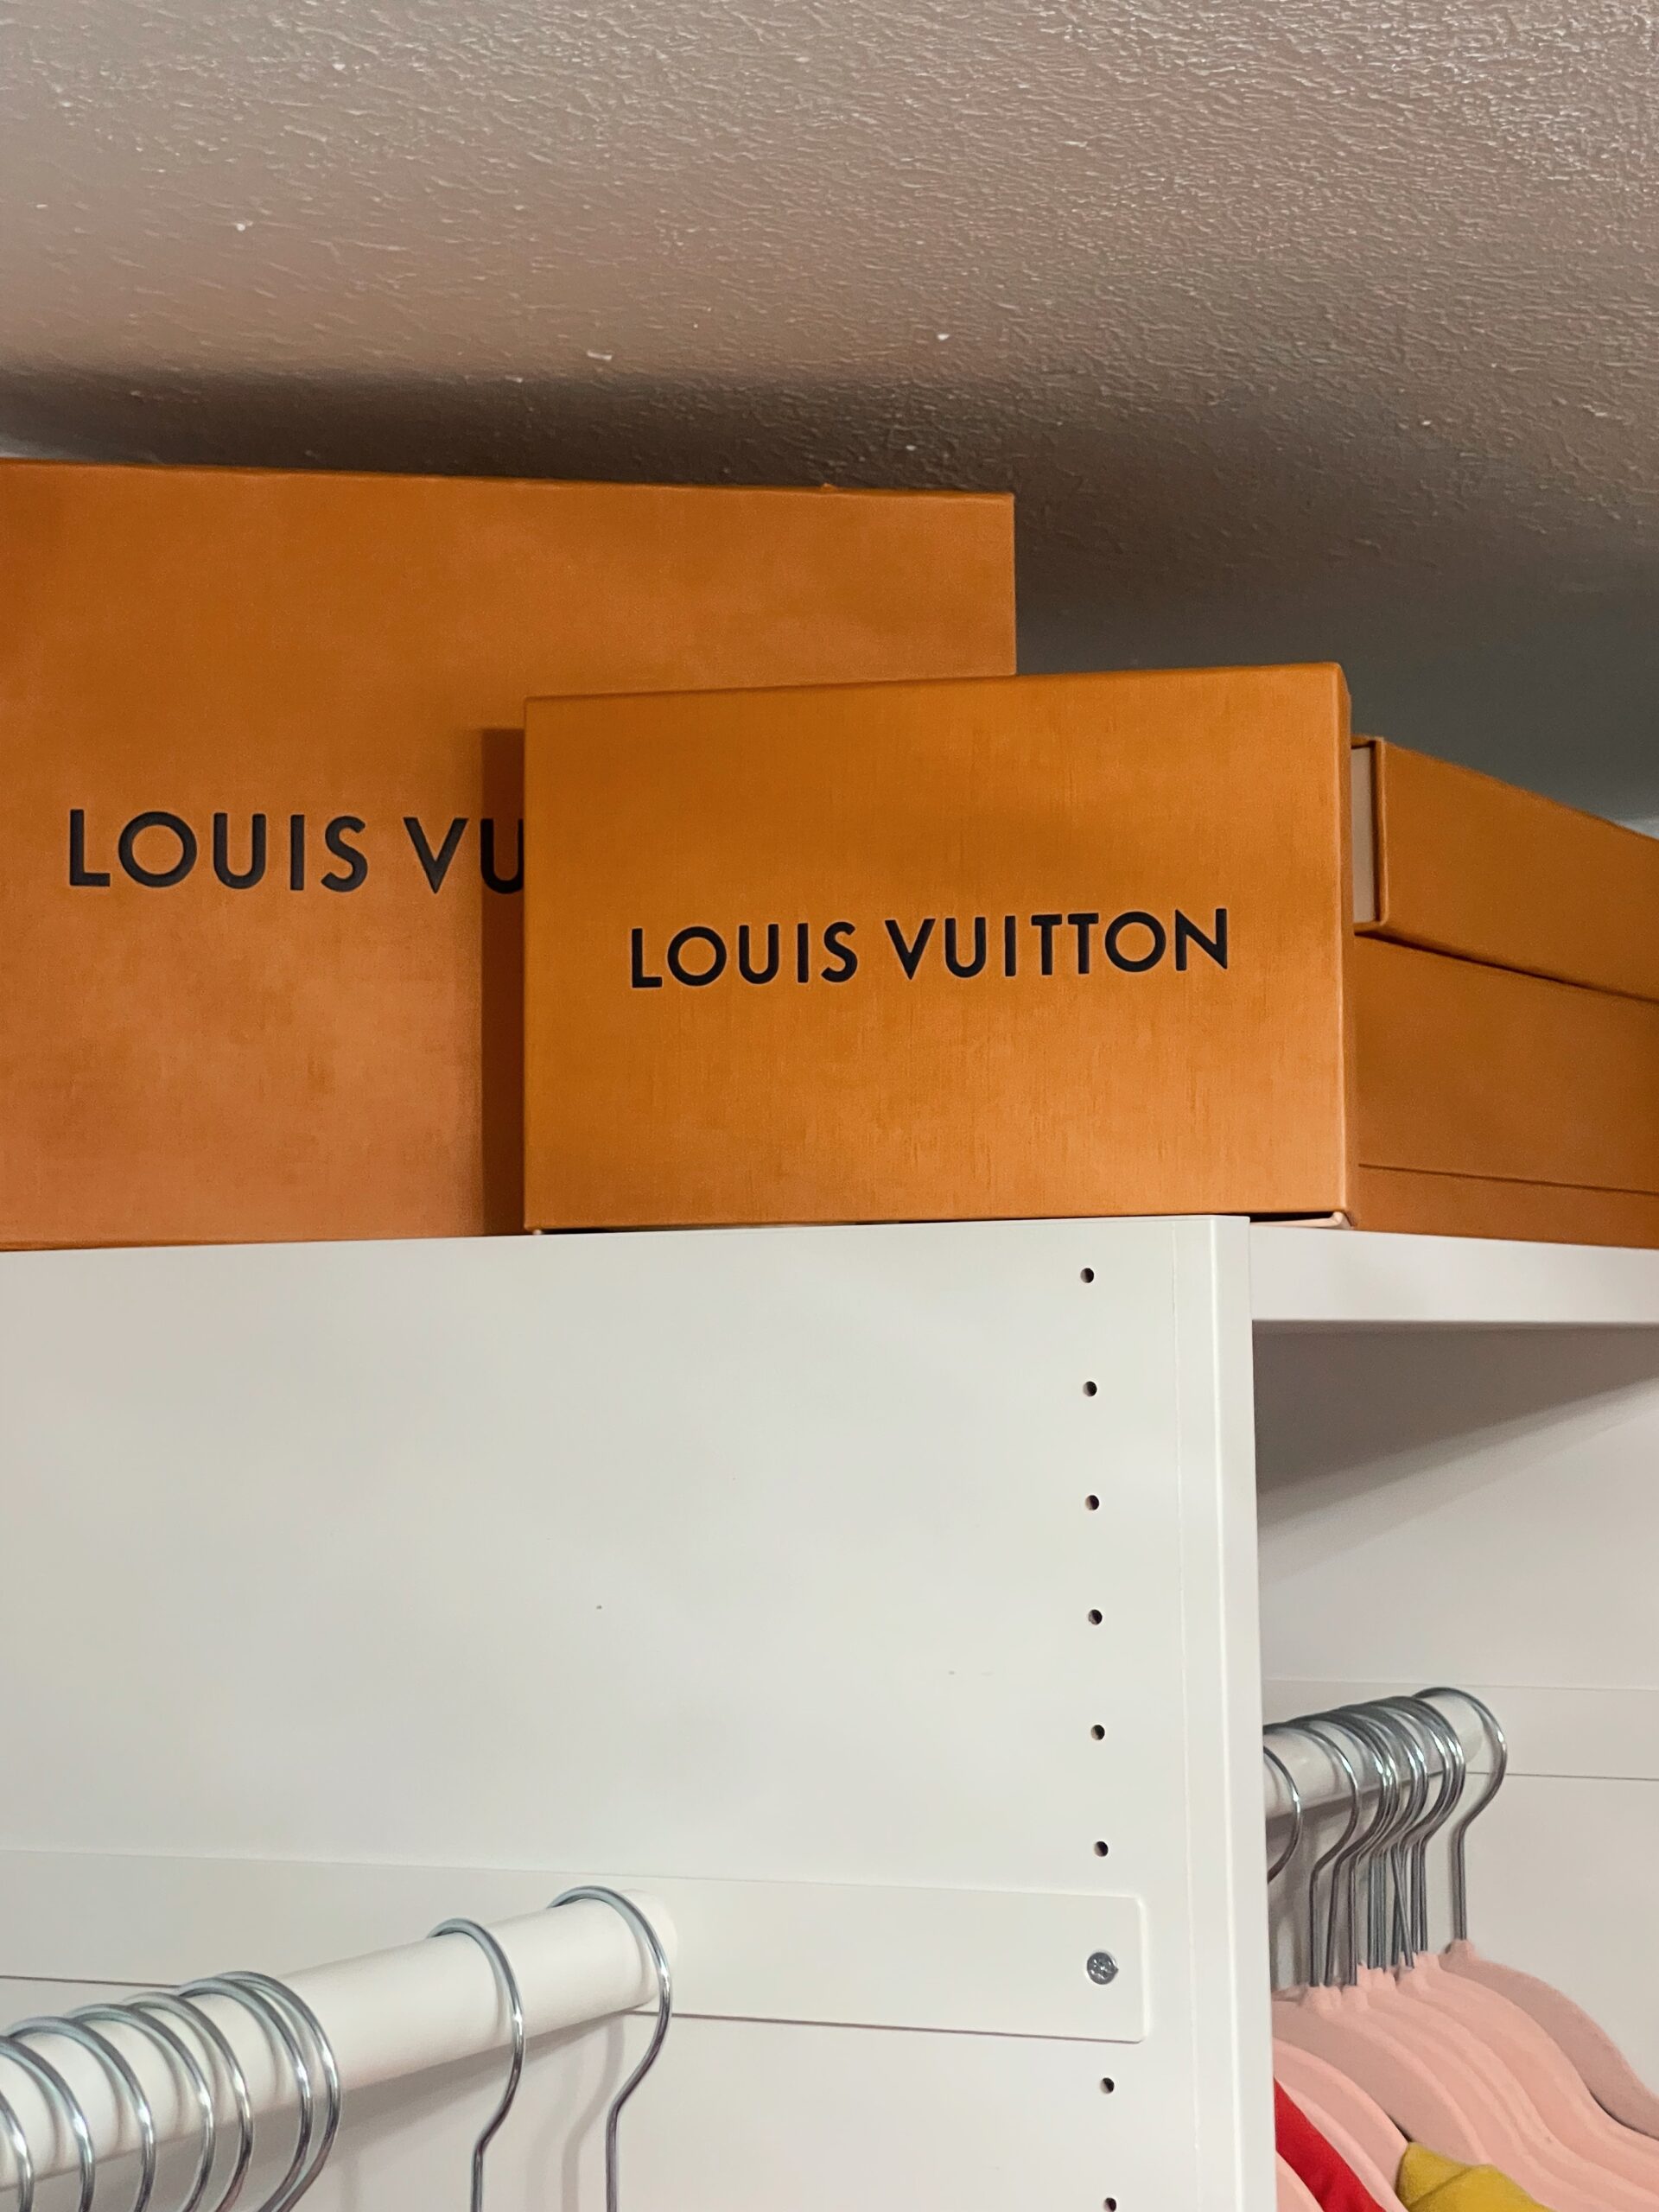
- Designer boxes – Ever keep boxes from designer items you’ve purchased? If not, start now because you never know when they’ll come in handy for décor display. The top of each of my wardrobe systems has designer boxes (Louis Vuitton, Gucci, Tiffany, YSL, Christian Louboutin, etc..) that I’ve accumulated over time. Adding these were the perfect touch for giving Living LavAshley vibes (lol).
- Display Details – Lastly, the minor details of the way you display things matter. Jacobie strategically placed all my shoes and purses in a way that I wouldn’t have thought to do, so I appreciated having his expertise. From the direction of the shoe placement to the folding of my jeans – he nailed it!

Whew, this was a long one, but details were requested, so I aim to please. If you’ve read this far, I hope you found this to be helpful. Please share your favorite part about my closet transformation process in the comments and share it with a friend who needs detailed inspiration. Find part 1 of my closet transformation video here and part two here. Stick around for more home edits and Living Lavashley deets!

